Projects
Working on a PROJECT ?
Please pass it along.
Clickon
image to ENLARGE

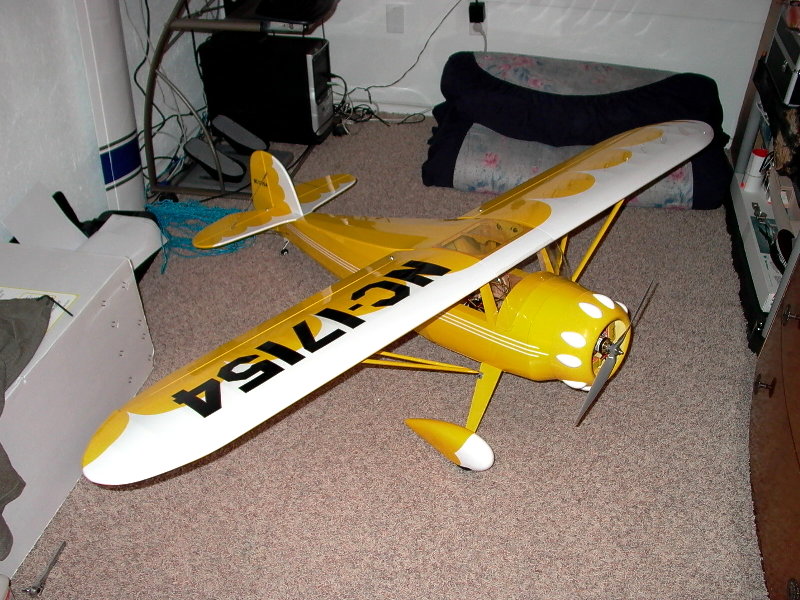
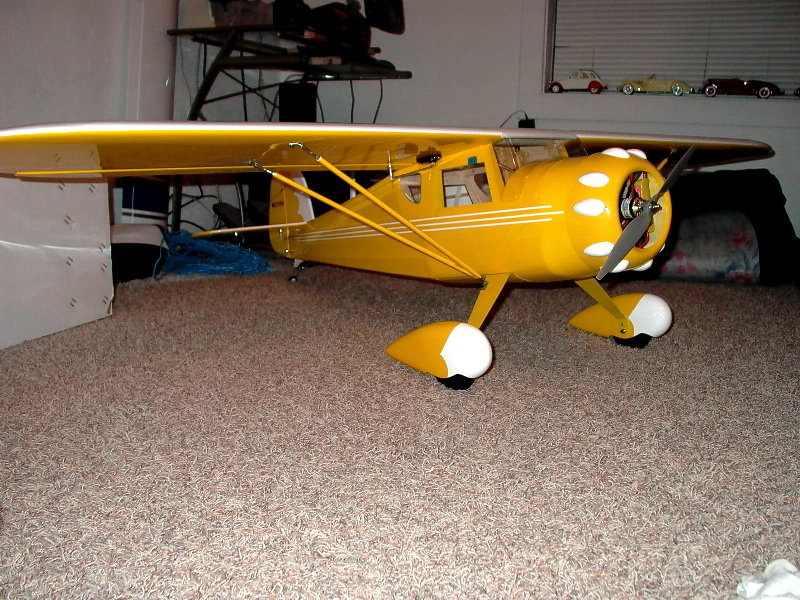
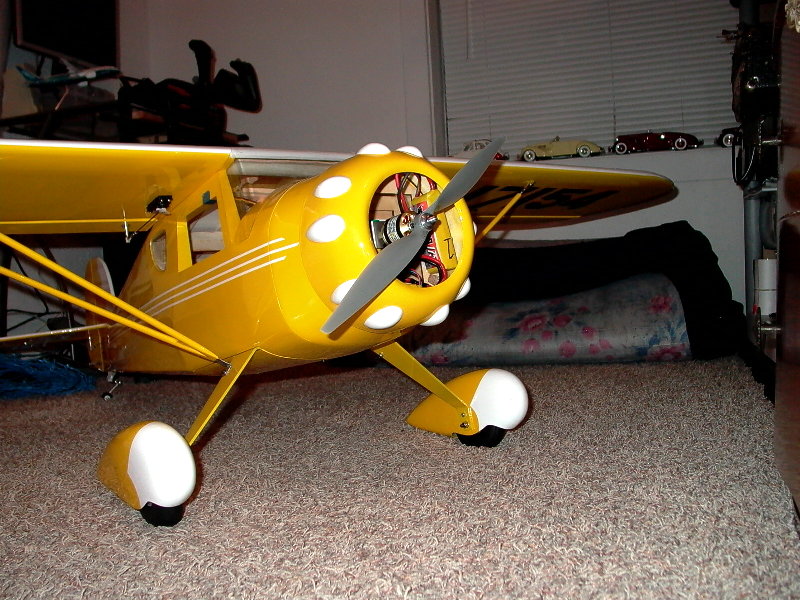
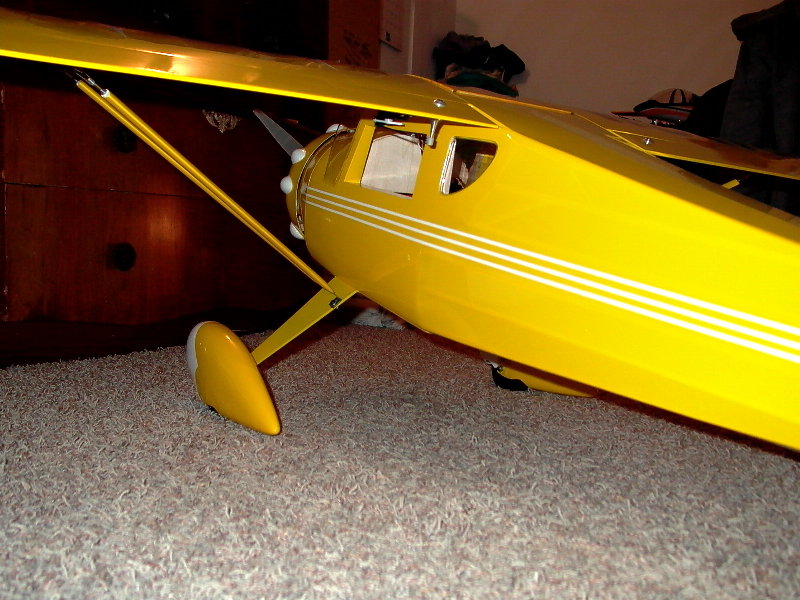
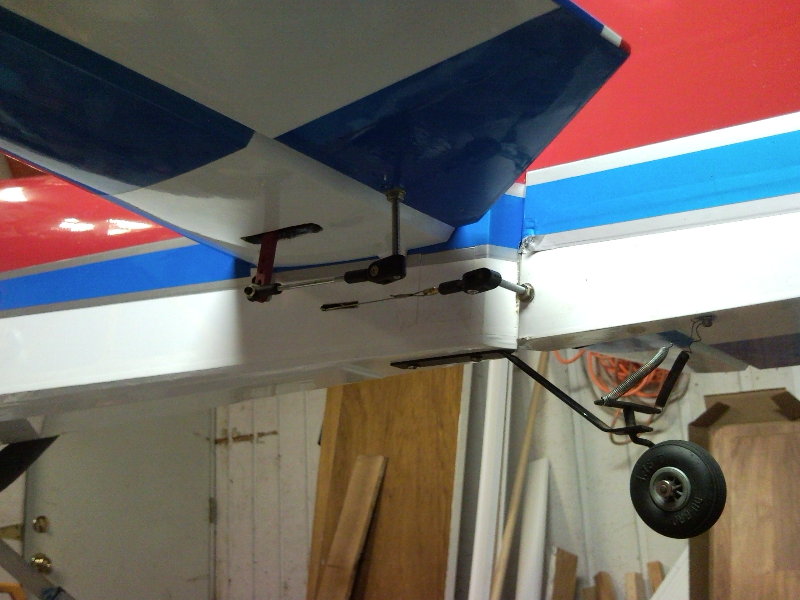
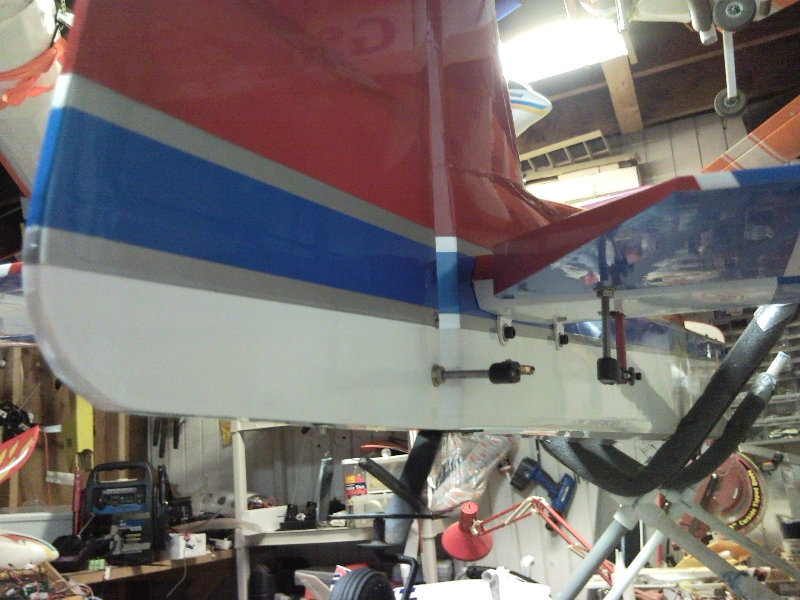
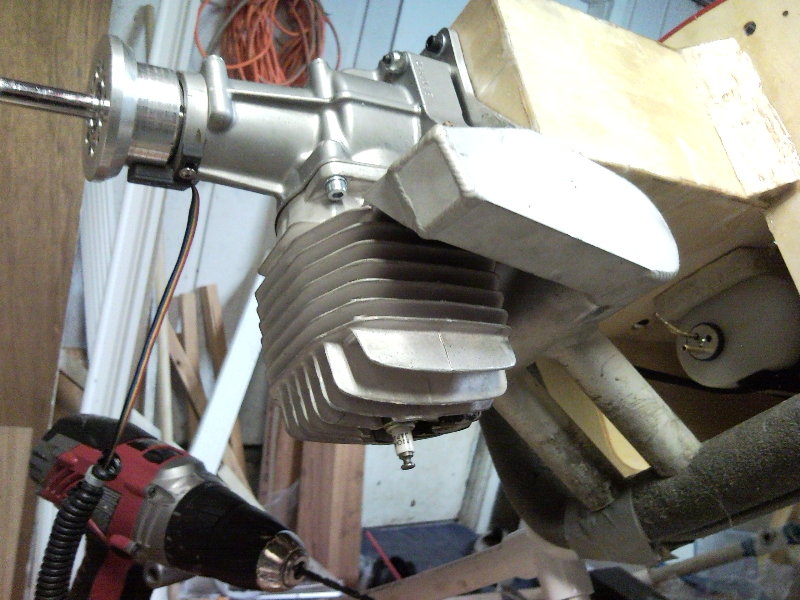
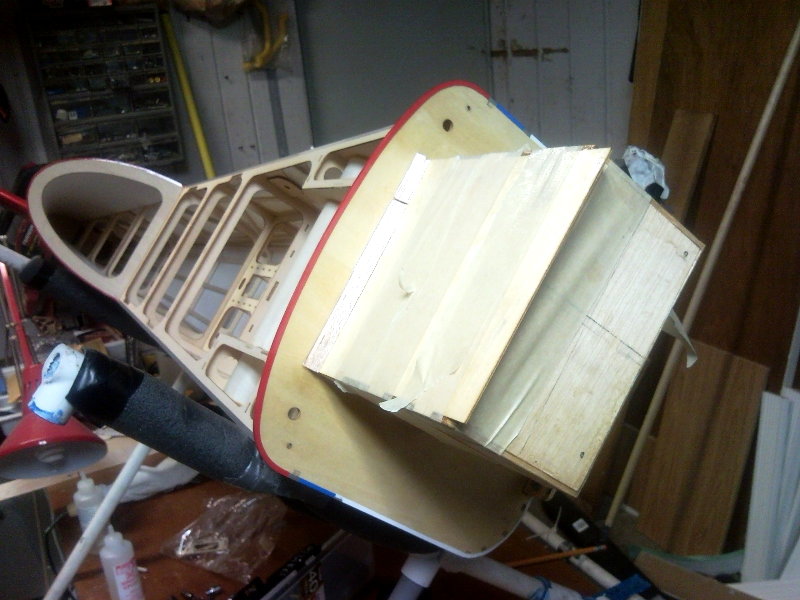
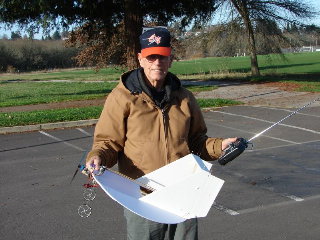
June 17 - Mark Cross photos
|
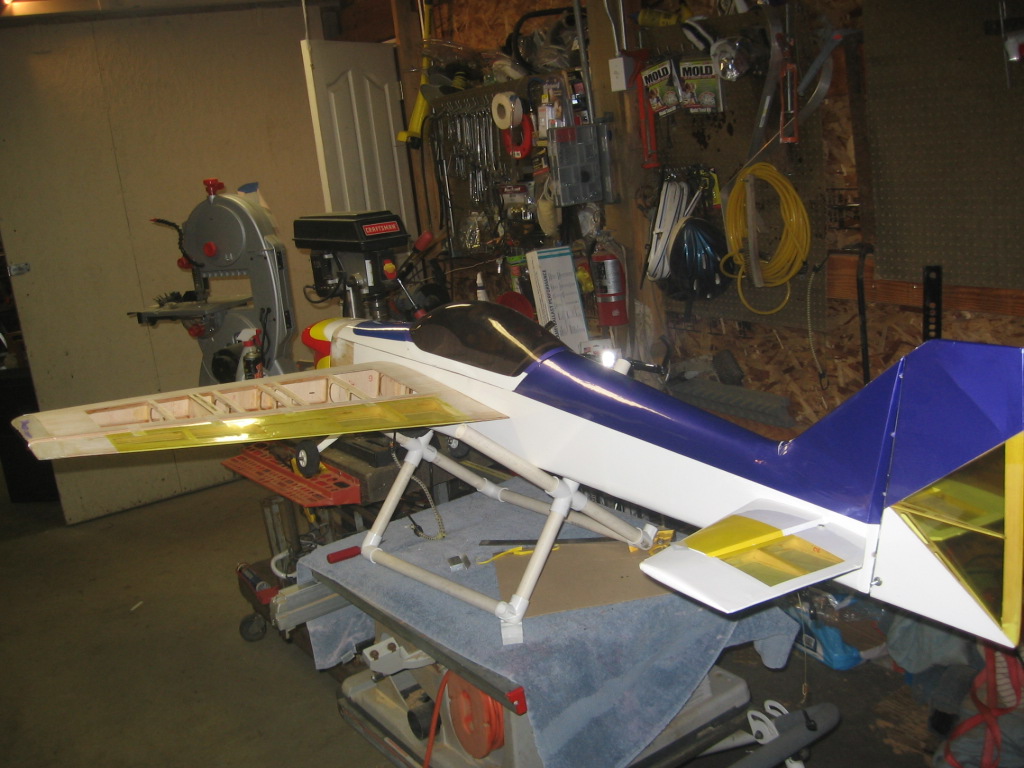
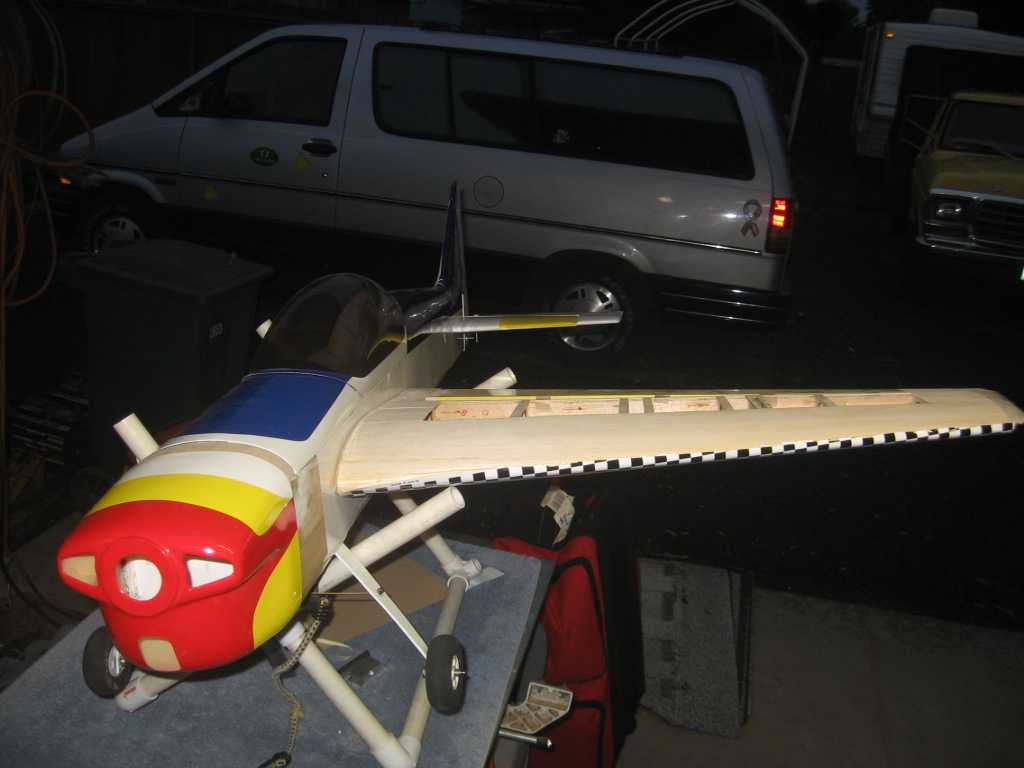
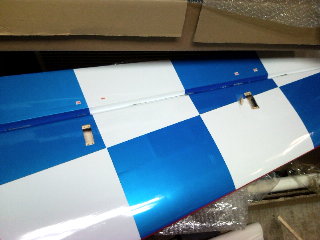
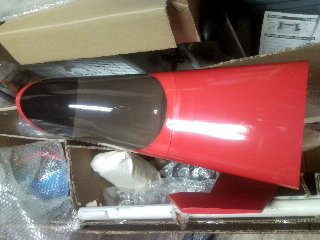
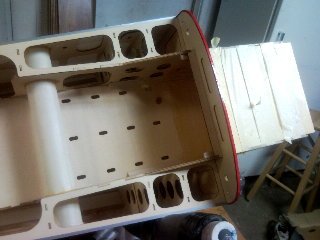
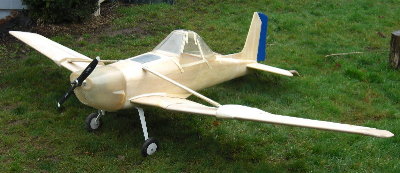
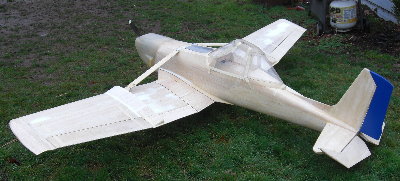
Monocoupe 90a
Here are some
pictures of my electric conversion 76in span Kangke Monocoupe 90a. I
hope to have the large outrunner and batterys from Hong Kong for it
soon so I can fly it. Current motor is to light. Enjoy Mark Cross
|
June 16
Hi All I’m
back!!!
0616-2009
After finishing
the AgWagon I am taking time off from building. I hope to fly a
lot more this summer and I put building on hold tell the rains come
again.
However, I have my
next project.
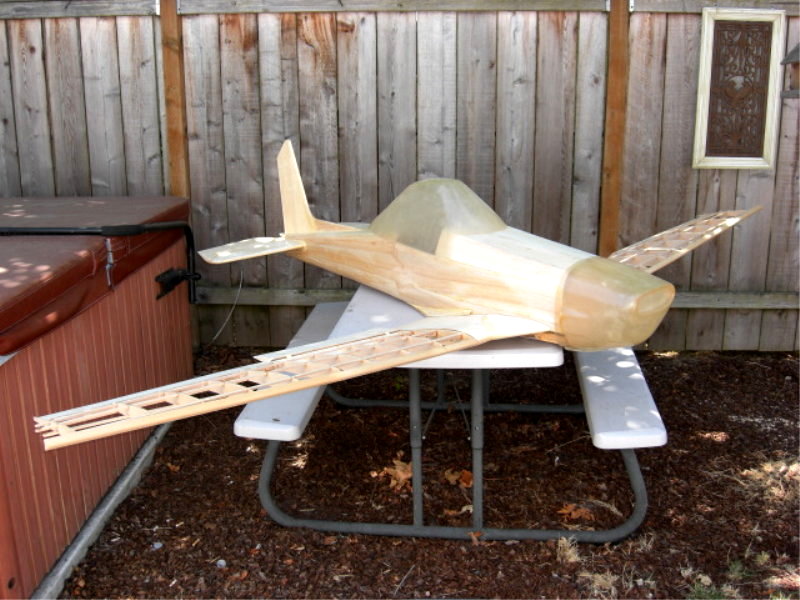
For the past six
or seven years I have been looking for plans for a little racer called
“LITTLE BONZO”. Why you ask? Well, the story goes like this.
There was a man by the name of Steve Wittman (no relation) who built
and raced planes in the late 1940’s. As you can imagine sense we have
the same last name I got interested in his planes. I always said,
someday I want to build that plane. I got serious about finding plans
and started surfing the internet, back issues of the R/C mags and could
find no plans for this little airplane. I did find some history of
LITTLE BONZO on Google. Here is the link
http://www.airventuremuseum.org/collection/aircraft/Wittman%20DFA%20Little%20Bonzo.asp
Eaa Museum in
Oshkosh had a 3 view for $15.00. So I ordered it. It came on an 8
½ by 14 in paper. HMMmmm How am I guna blow that up to the size
I wanted to build.
That was 4 years
ago I go the 3view.
Last month I wend
to see the kids and grandkid in California and I was given a float
plain kit. One of them flying boats (CRUSER II) with no plans. So
off I went on the internet and Google search for plans for this thing.
Well to make a long story short, in my search I ran across a web sit
(My UNCLE WHILLY) that was said to have most plans. My search didn’t
find any plans for the curser ll, but on page 13 (and I always thought
that it was an unlucky number) was BONZO. Well after looking at the
plans I don’t remember if I wet my pants or thought about
it!!!!!!! Forget about the CRUSER II !!!!!!! So for $5.00 I
got plans for LITTLE BONZO!! I’m so happy!!!
I was also happy
about the fact that I could send this file to a guy that will make
paper prints any size you want for $19.95 any size !!!!! So I emailed
him and yes he can and yes he did!!!
I now have planes
for a BONZO with a 62in wing. It will be powered with a Saito 91 that I
have had for this plain, also for a long time!! 62 in wing makes
it 33% scale.
I’m in no hurry
for the rains to come, but !!!!!!!!!
I also want to
thank Jim Corbett for make copies of the BONZO prints. I can cut them
up and save the original.. Thanks Jim
Marty Wittman
|
June 12 Jeff
Engel Pics
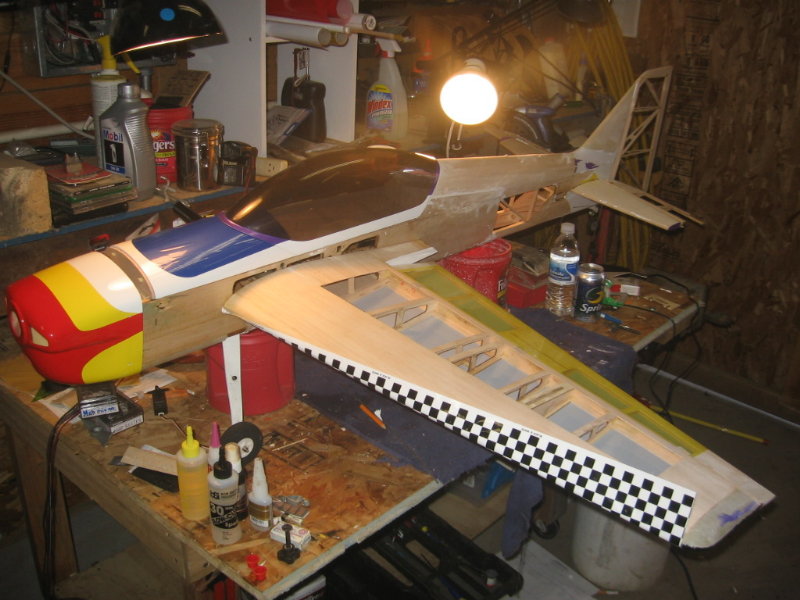
Showtime Project Progress I had a
baby she weighs 8 lbs 9 oz.s
Hope to do its maiden Sunday. JE
|
June 7
Pat Willis
photos
|
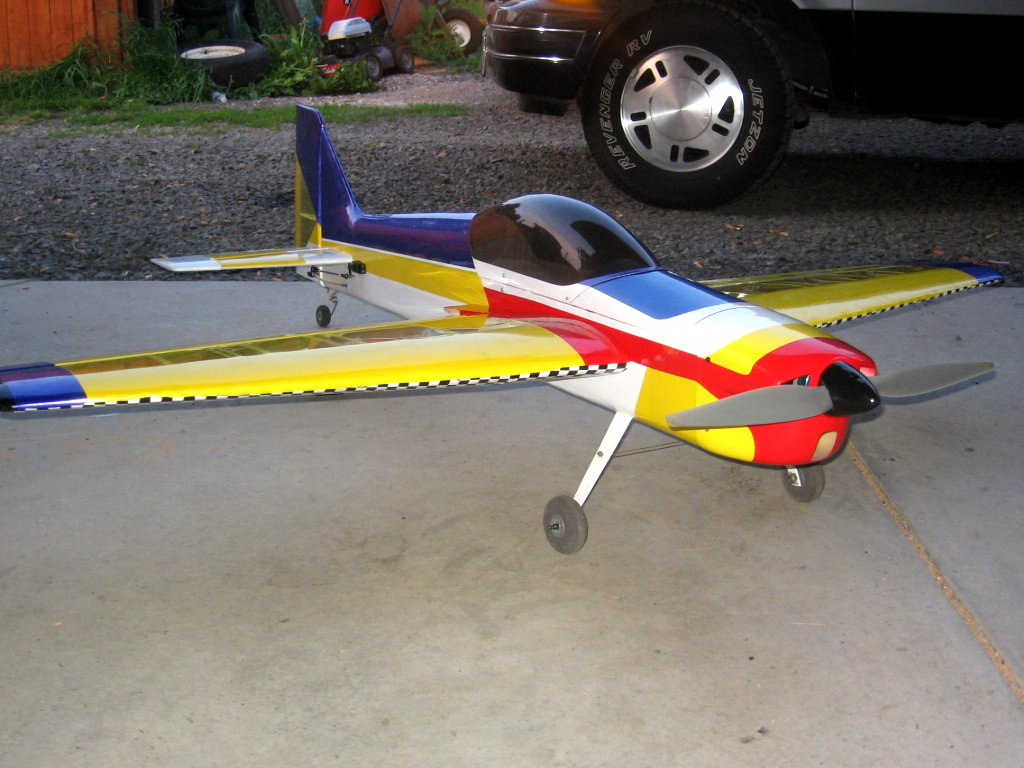
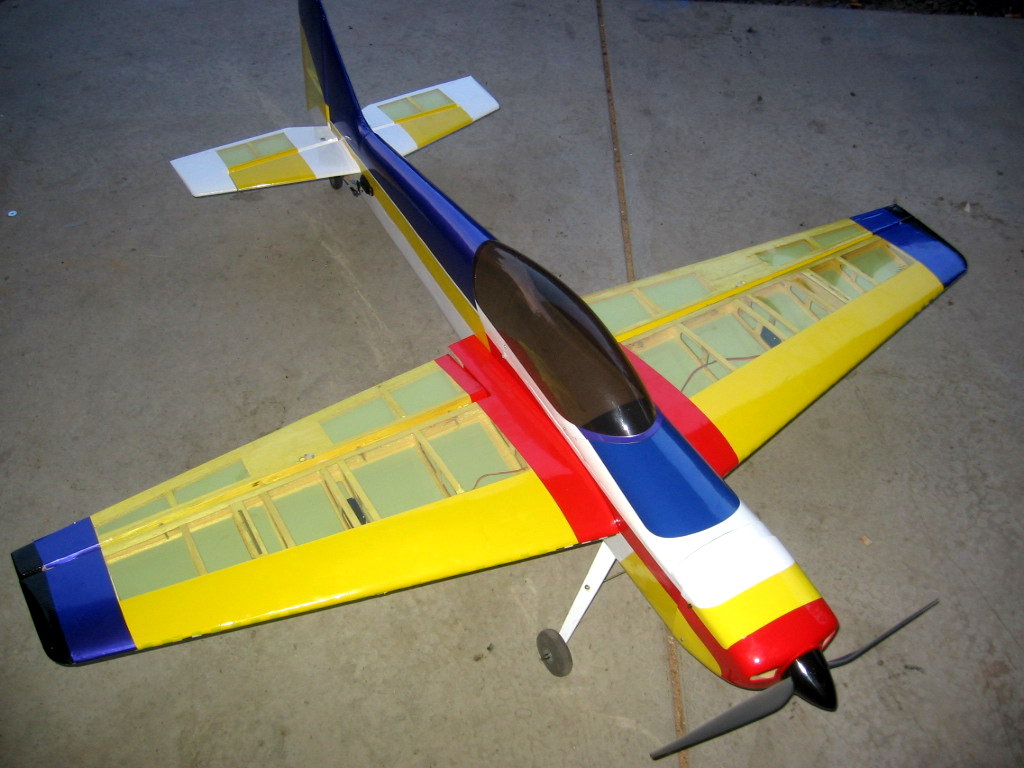
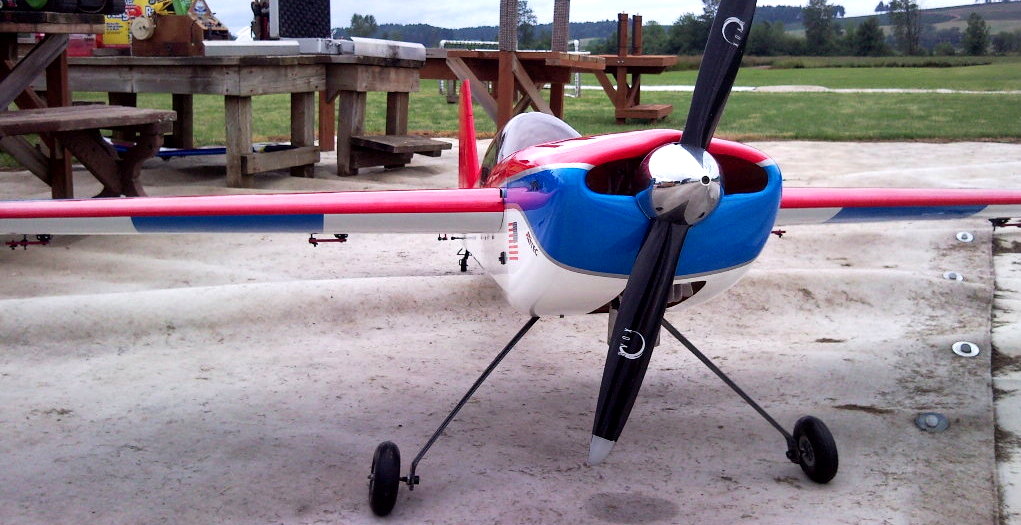
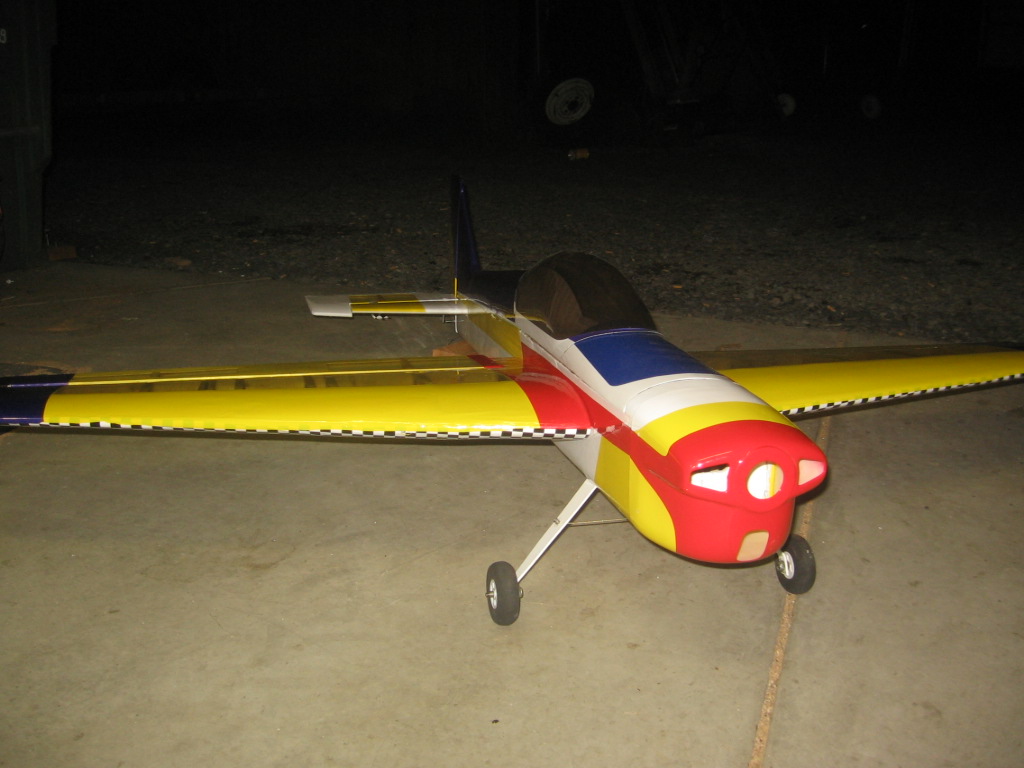
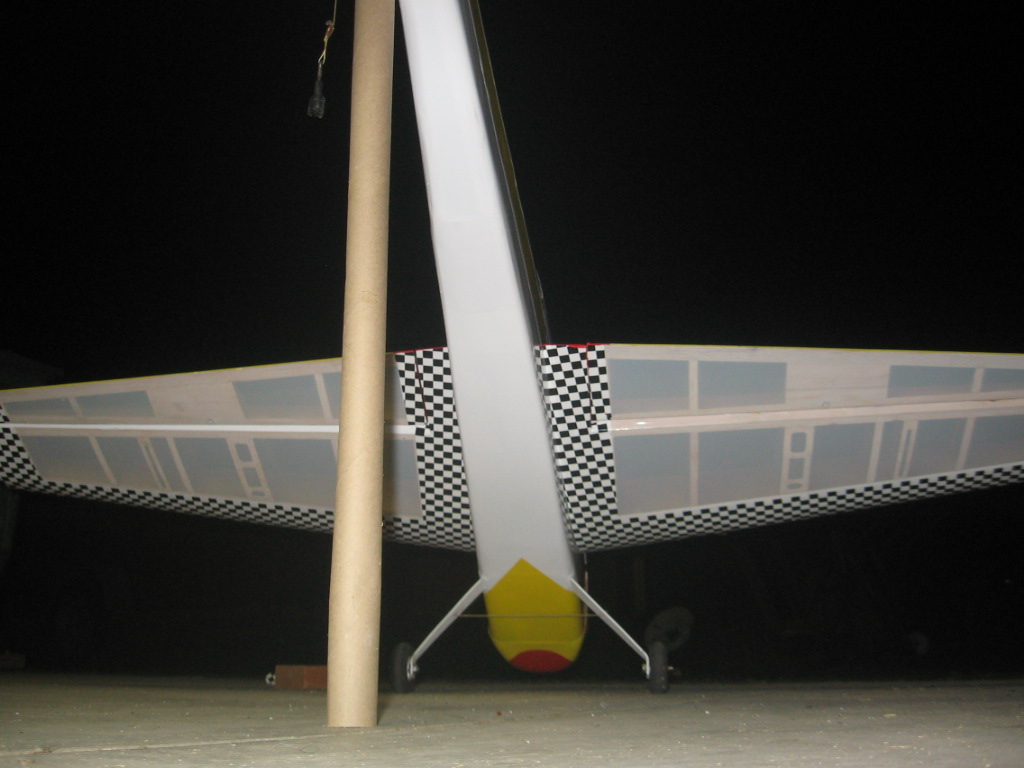
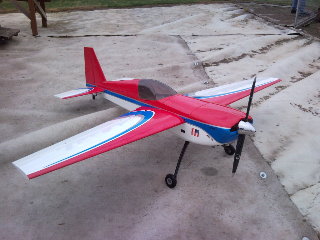
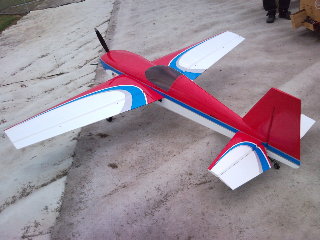
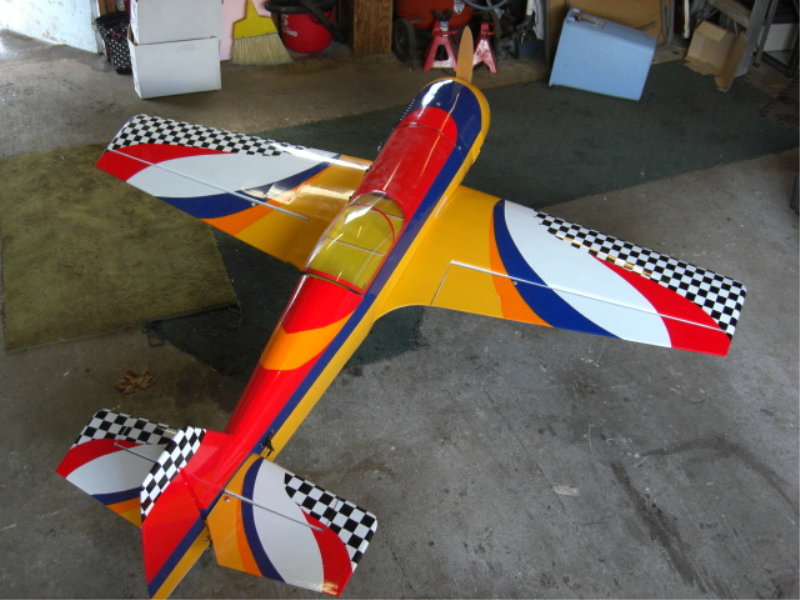
Extra 260 Finished
|
The new plane flew, and flew very
nicely. It started out a little too tail-heavy for my taste, so I
moved one of the batteries a little bit and was able to get the balance
just about right. However, on the fourth flight, I got a little
delay
in the control response and decided to bring it in and try and find the
problem. I’m going to move things around a little bit, away from
the
receiver, and try again next week… maybe even on Saturday since I have
that day off now.
|
Everyone asked how the Extra 260
compared to the Yak 54. The Yak tumbled better and seemed to be a
little more precise. The Extra holds a hover much better and
makes
torque rolling easier as well. The Yak’s rudder was a little
bigger
and it had more rudder authority in knife edge. I had a hard time
getting a solid harrier with the Extra today, but I may have just not
found its sweet spot yet with the perfect combination of attitude and
throttle. Again, I’ll be making some adjustments to try and get
the
Extra up to par on the characteristics where I feel it’s lacking.
|
|
Overall it was a very sweet plane to
fly. -Pat
|
June 6 Jeff
Engel Pics
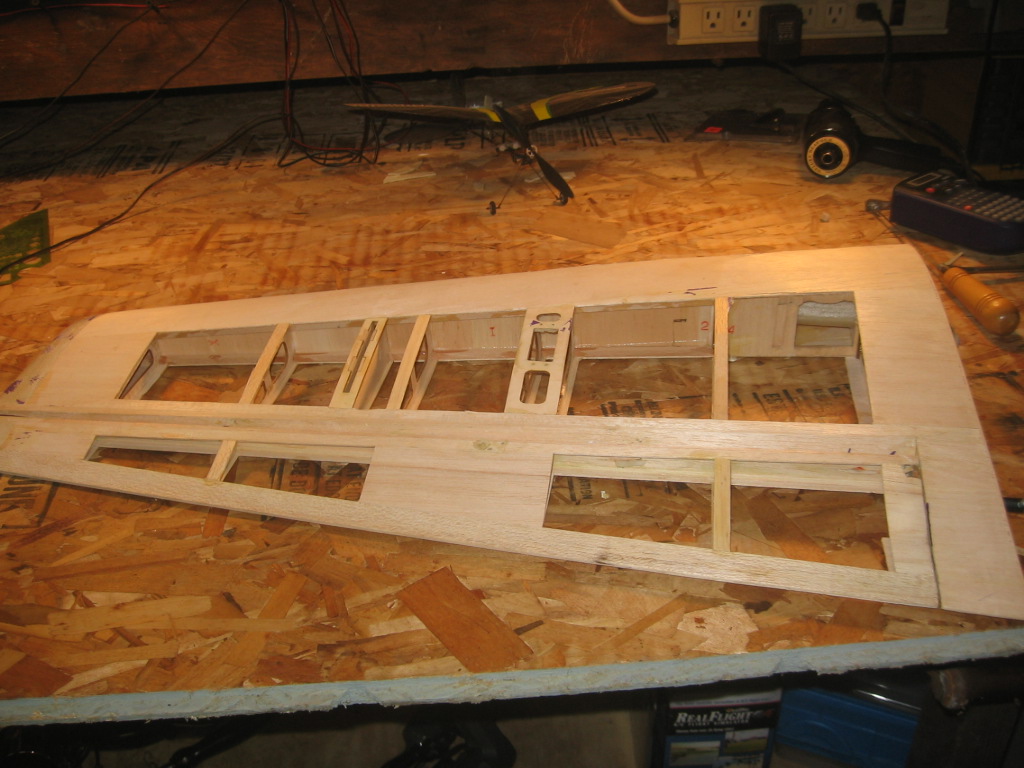
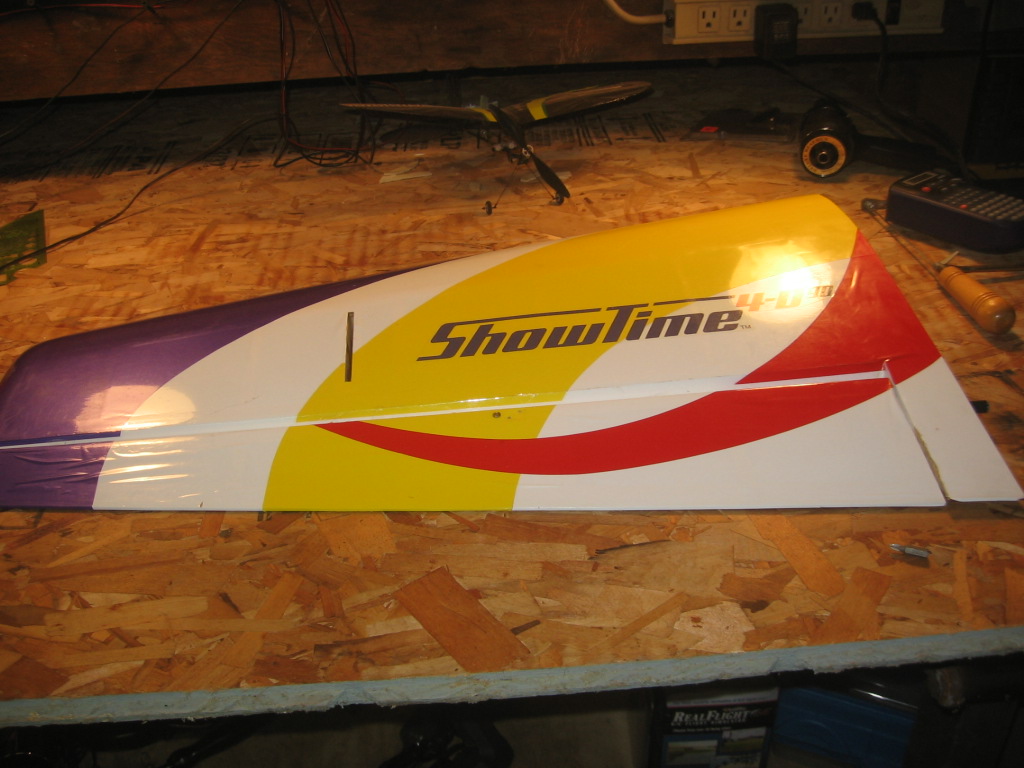
Showtime Project Progress It
might be ready for Oakridge!. JE
|
June 3 Jeff
Engel Pics
Showtime Project Progress
Its gettin' there. JE
|
May 27
Pat Willis
photos
|
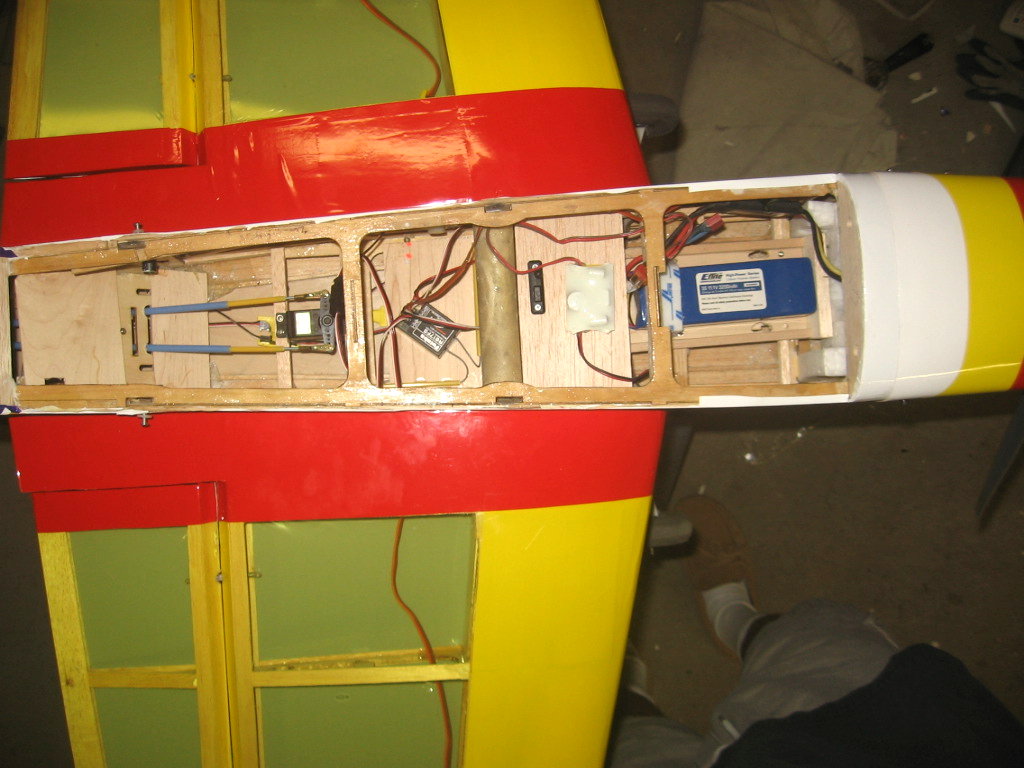
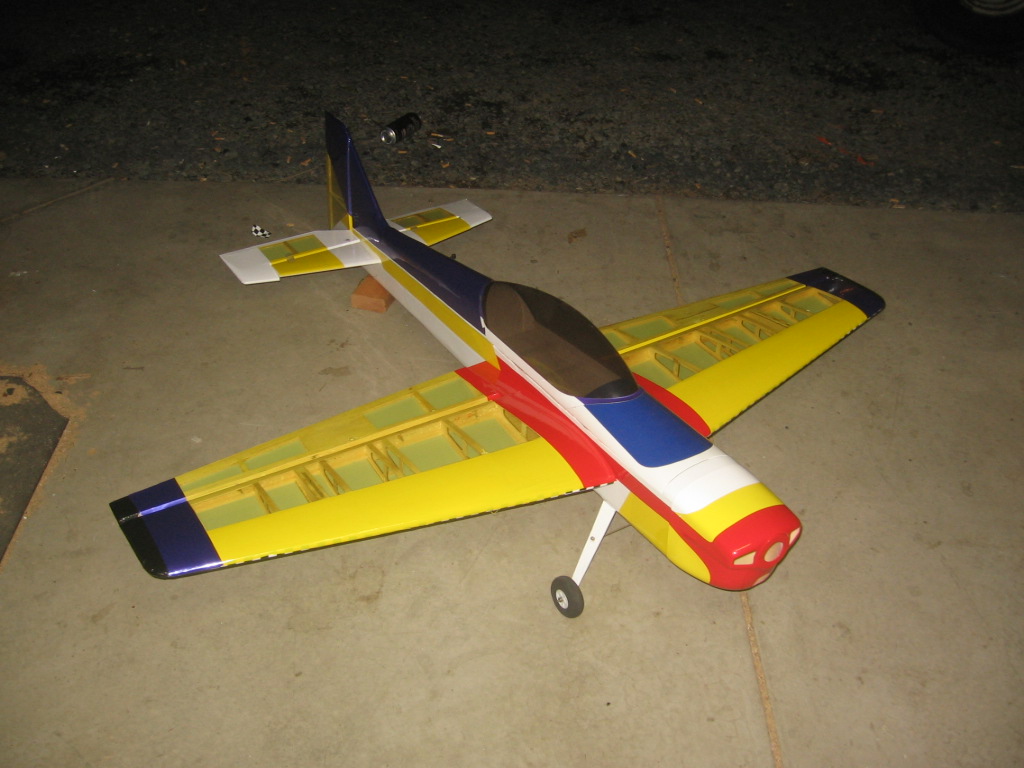
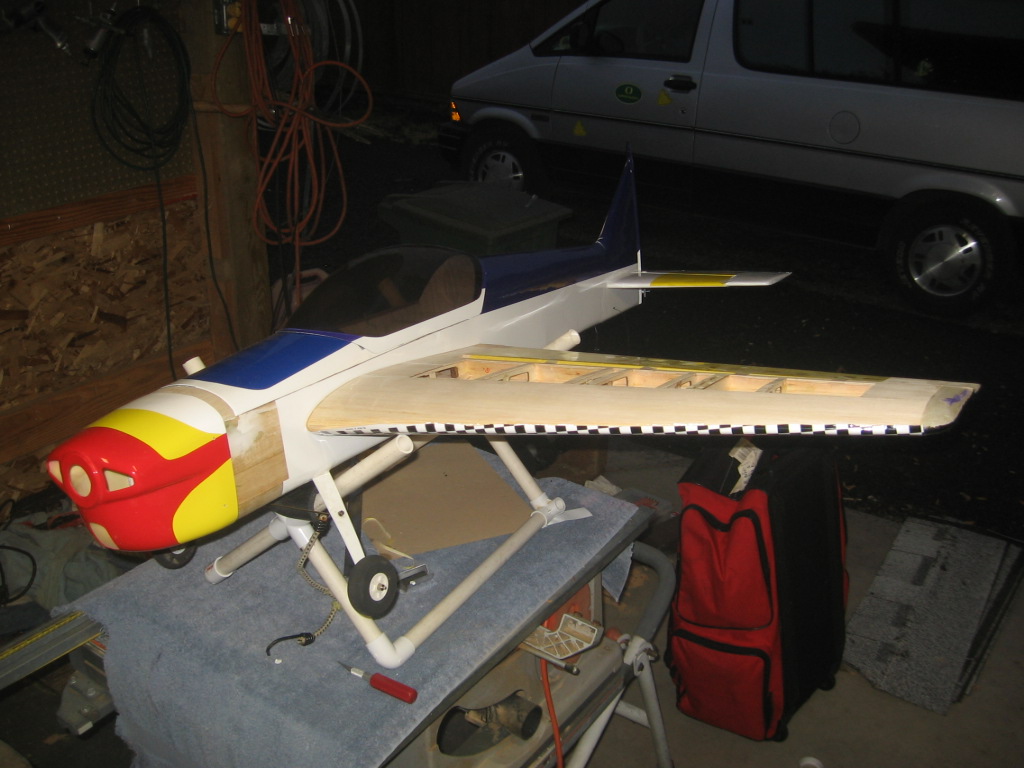
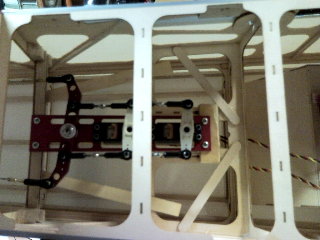
Extra 260
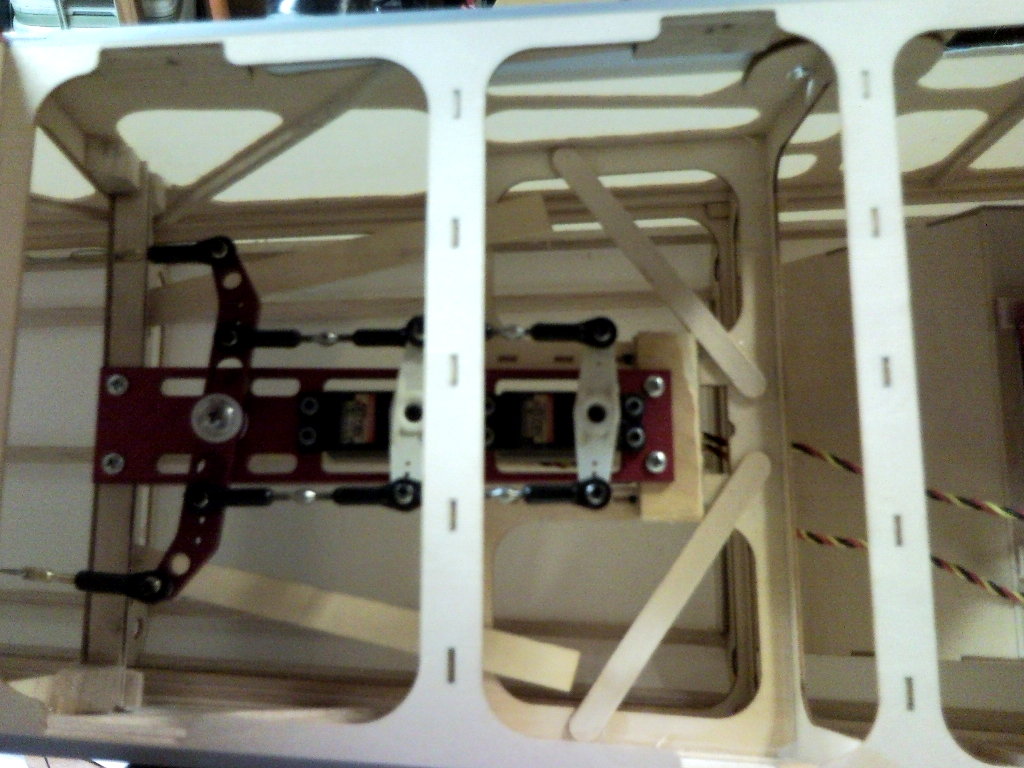
| The 3W85xi is now installed and the cowl
has been fitted. I have installed the servos for the rudder,
elevators, throttle, and choke. I discovered that my smoke pump
is, once again, not working, so I’ll be sending it off for repairs
again. The stabs are now installed and the hinging is all
done. The installation of the rudder servos was a bit tricky
since it is set up for just one servo, but I have a special SWB metal
tray for two servos.
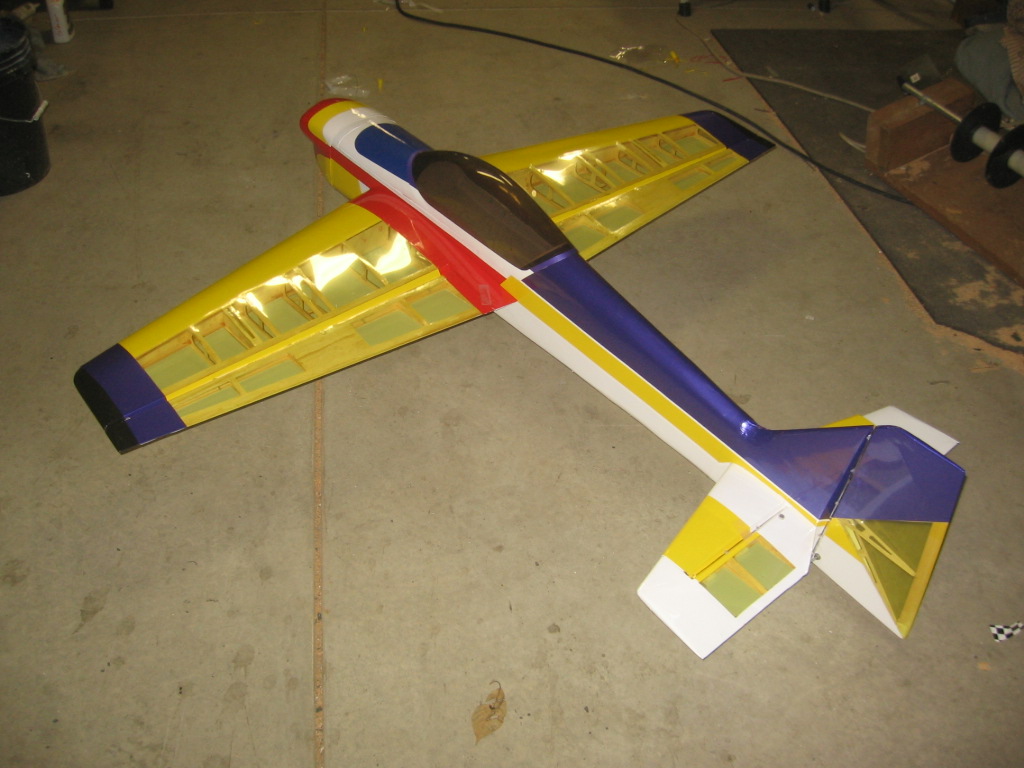
I had to do some cutting and
reinforcing to make it work and make it strong. I also
fiberglassed
the entire engine box for extra strength and rigidity. |
|
Next comes
installing the servos and control horns for the ailerons.
|
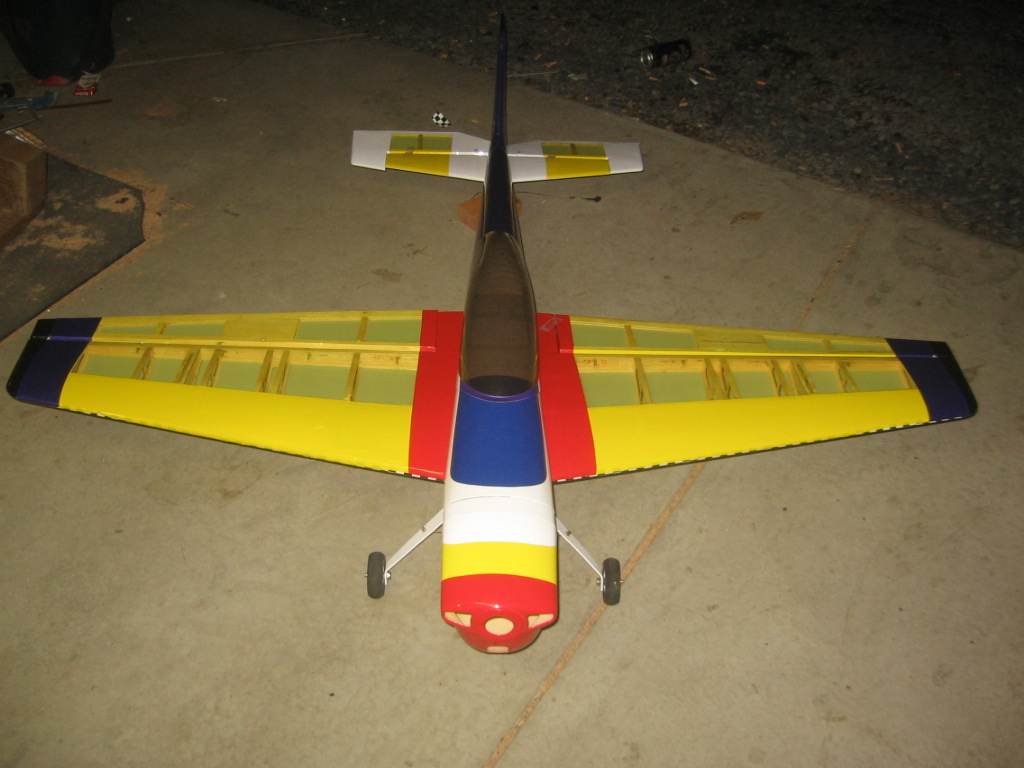
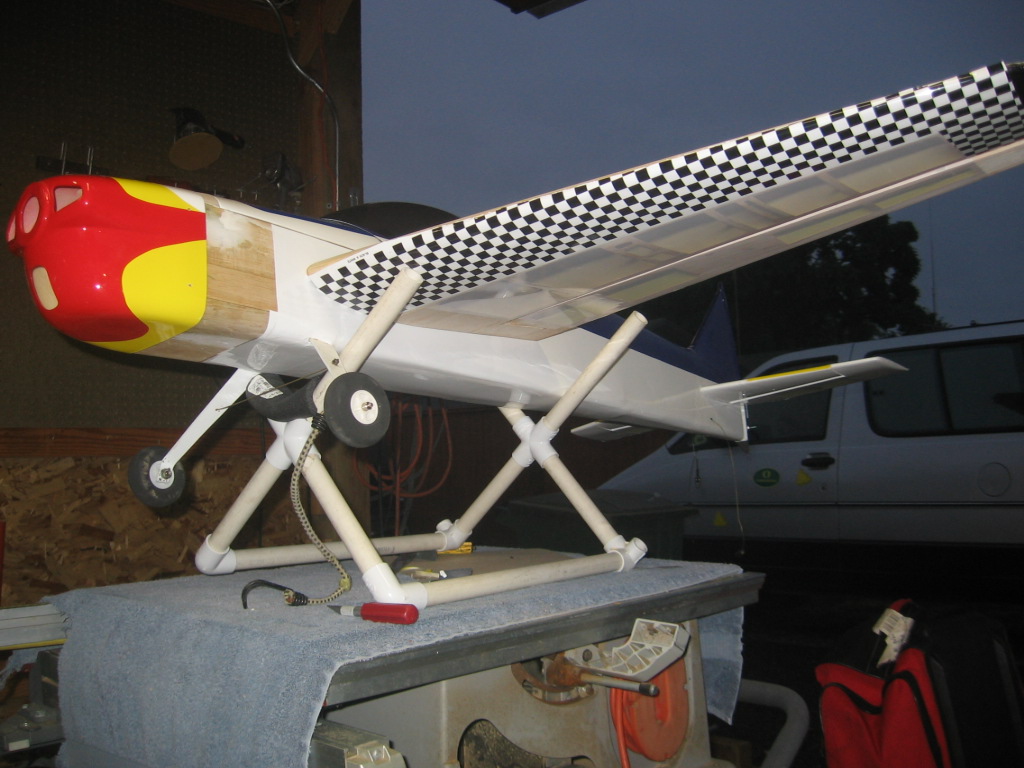
I’m going to be using slightly stronger
servos than on the Yak, since I had them lying around. They are
slightly slower, unfortunately, but I’ll make do. The new servos
are Hitec 5645MG’s. I took them off the elevators for the Yak and
the ailerons on my Giles.
The Extra will have the T170 titanium gear 333oz/in servos on the
elevators and two Hitec 5955TG’s on the rudder. In the pictures,
you can also see the 2” SWB aluminum servo arms that have become the
standard for these big planes with big servos and big control surfaces.
|
 The biggest hurdle
I’ve run into so far has been the installation of the engine. The
3W85xi is at the top of the
range for this plane, although I’ve heard of people fitting 100cc twins
in them. The footprint of the engine mounting plate took up
almost the entire firewall. Here’s hoping and praying that it is
going to be strong enough. The biggest hurdle
I’ve run into so far has been the installation of the engine. The
3W85xi is at the top of the
range for this plane, although I’ve heard of people fitting 100cc twins
in them. The footprint of the engine mounting plate took up
almost the entire firewall. Here’s hoping and praying that it is
going to be strong enough. |
There is not a lot
left to do, but because of some work-related issues I probably won’t
have the chance to test fly it for two more weeks, possibly on 6/7 or
6/8.
-Pat
|
May
22 Pat Willis
photos

|
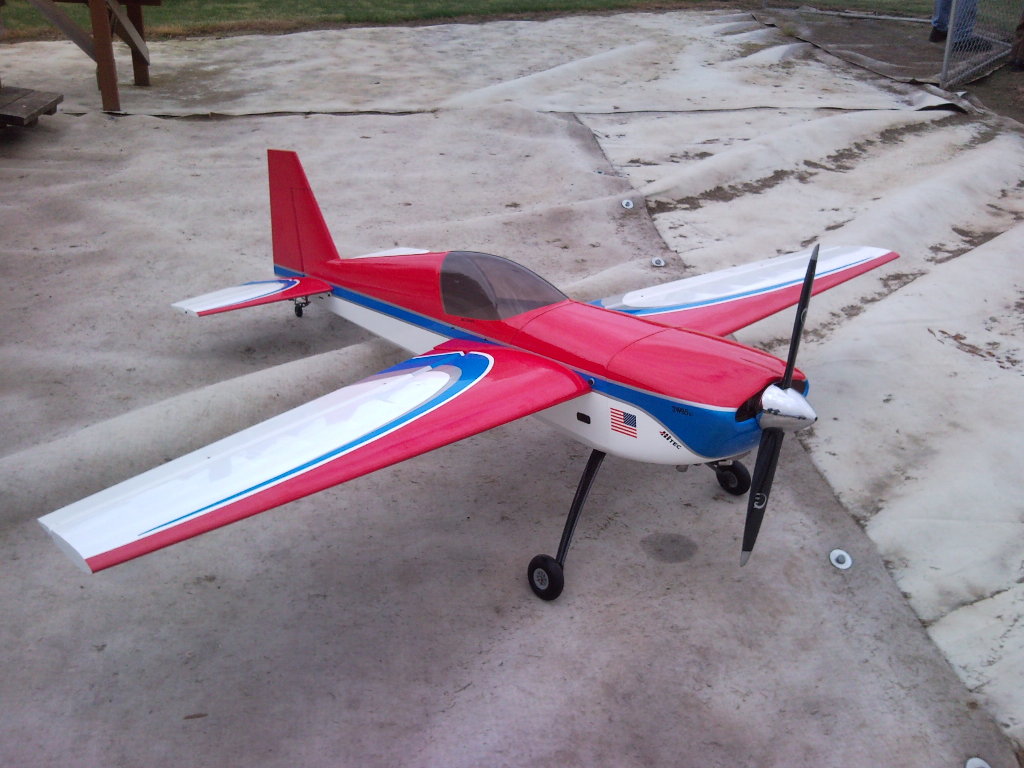
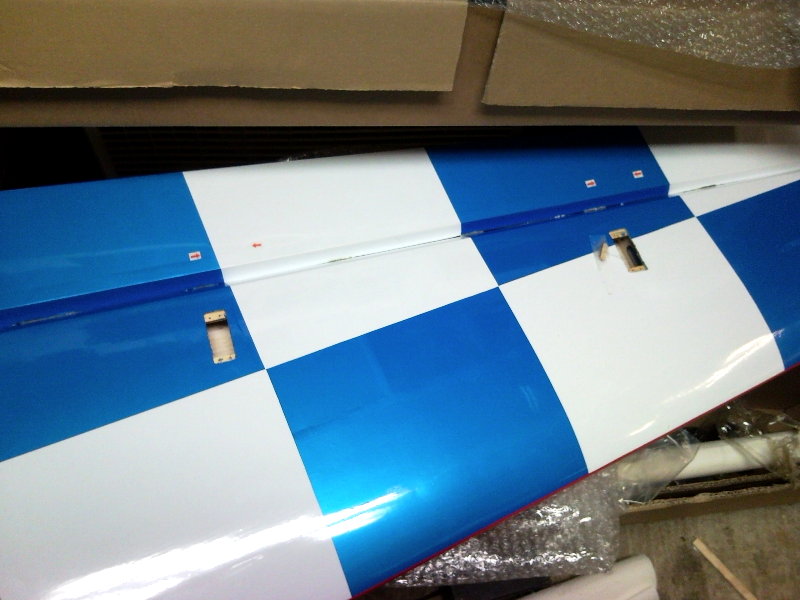
Yak 54
|
I have purchased a replacement airframe
for the Yak 54, which is in need of some respite and some cosmetic
assistance, (not everyone wants their plane to look like Doug’s yellow
monstrosity!). I brought it to the meeting the other day and let
the membership see what a nice job the company did assembling and
covering this airframe.
|
|
 |
So far, I have gone over all of the
covering with an iron to make sure that all of the seams are sealed and
the few wrinkles are gone. A lot of people skip this step, but
the fact is that when these ARF’s are covered in the factory, they are
in a hurry to get them done, and the plane travels overseas with
different temperature and barometric pressure exposure during the
trip. Therefore, I highly recommend taking this step.
|
Next, I glued the canopy in place using
some canopy glue from Eugene Toy and Hobby.
And then, the biggest step, and perhaps the most important to get just
right, I’m installing the firewall. It took about ½ ounce
of epoxy just to get it set in place and attach the top of the motor
box, along with some balsa triangle stock in the corners that I insist
on using to help make the structure stronger and more rigid. I
also added another 1/8” of ply directly to the back of the firewall
before installation since I am using an engine on the high end of the
recommended range.
|
 |
|
Next comes the hinging, which I hope to
start tomorrow night.
I will be moving all servos from the Yak
to this plane, along with the engine, (3W85xi) and the nifty carbon
fiber landing gear.
More to come…
-Pat
|
May 21 Chick foster photo
|
|
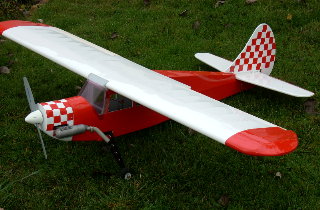
Just got done with my last kit build, Sig
Senior with a 46 ax for power.
Wanted to share with club. Chick foster.
|
May
21 Delayne Thompson photos
|
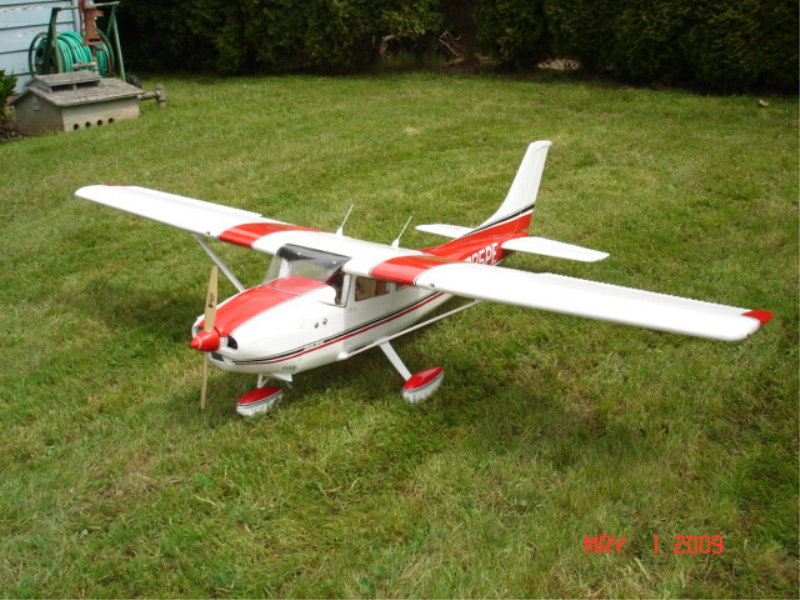
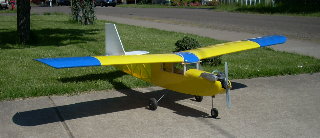
Here are a few pictures of my newly
completed Cessna 182 Skylane. Delayne Thompson
|
May 3 Jeff Engel Pics
Showtime Project Progress
|
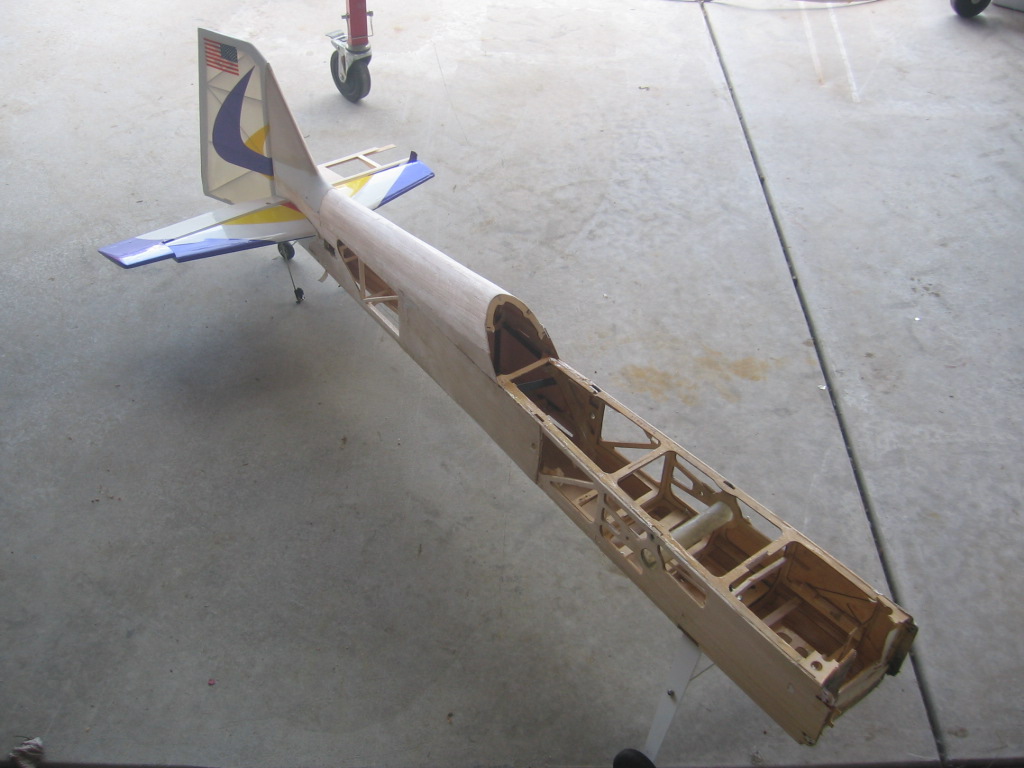
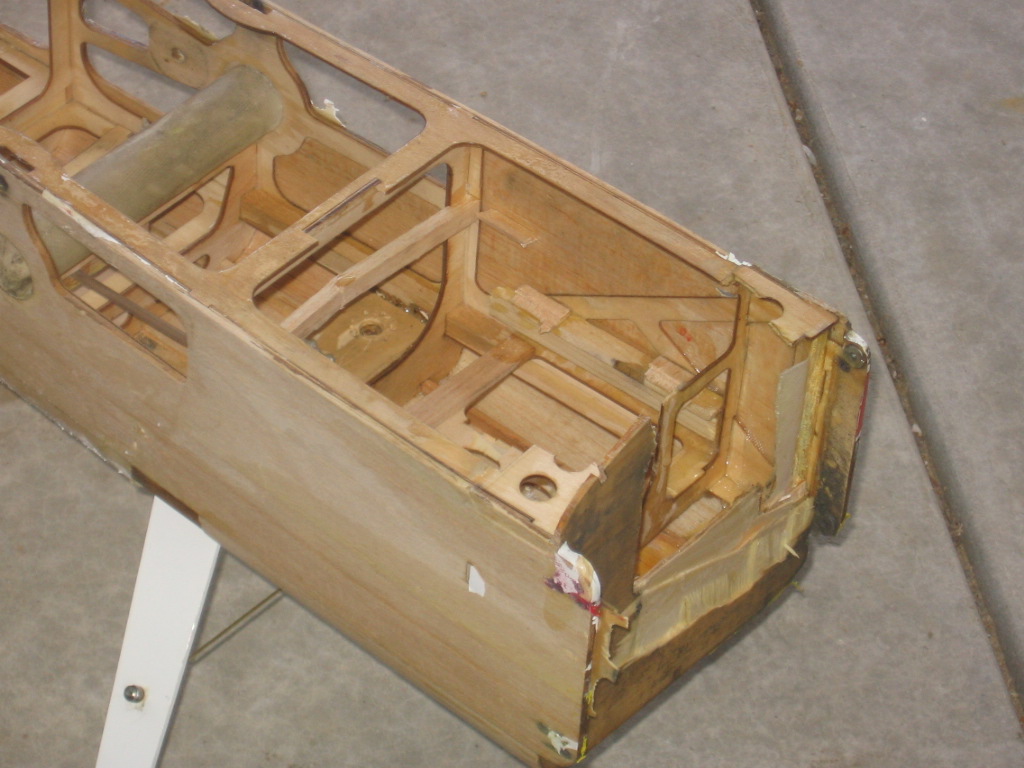
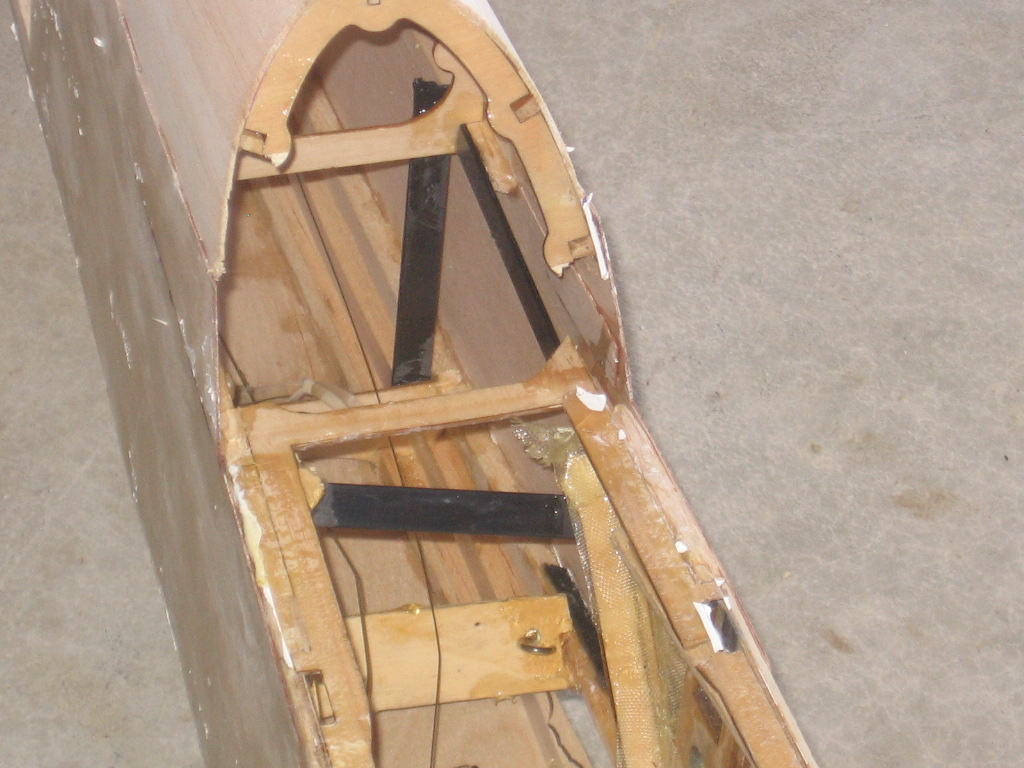
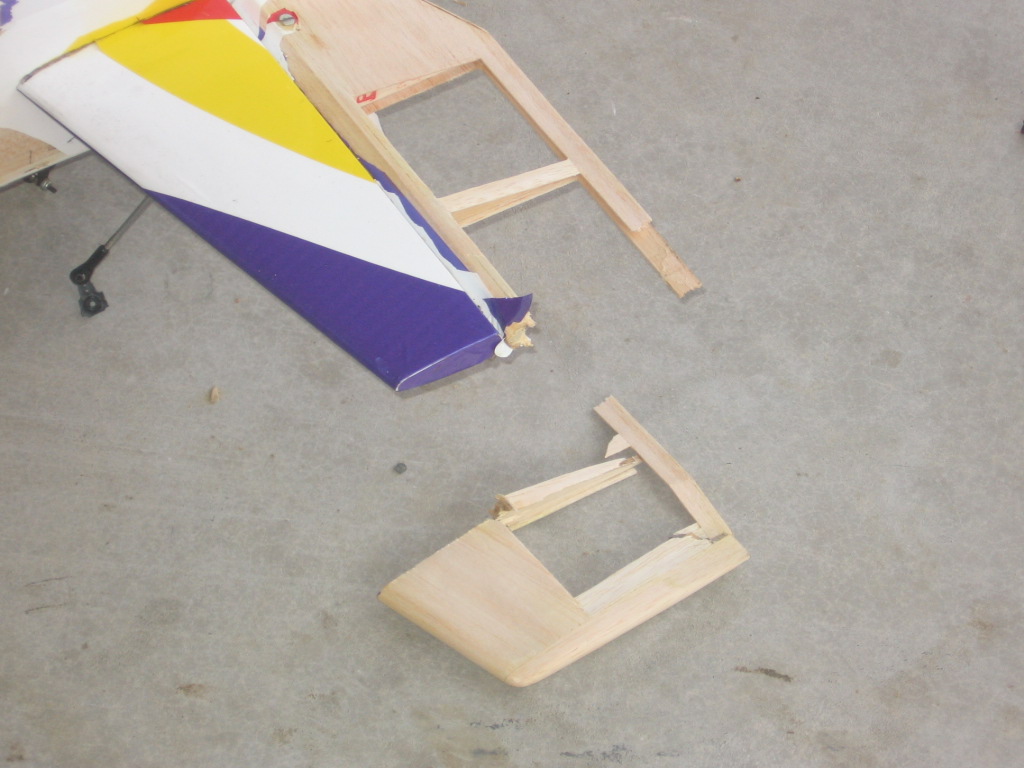
April 24 Jeff
Engel Pics
Khoi donatated this to me. I understand
that its been around. And when I got the covering off........Its been
around allright. And down and up and ran into things. But thats OK its
a good project. It will be resorected with a 160 electric motor and
Castle Creations 85HV ESC. I will keep sending you pictures as
the work progresses. I hope to fly it at the Oakridge Flyin.
Please inform
everyone...... especially Doug, that I won't work on it till the Lawn
mower shed is finished. I hope to have it out at the field by the
weekend 5-2-09
|
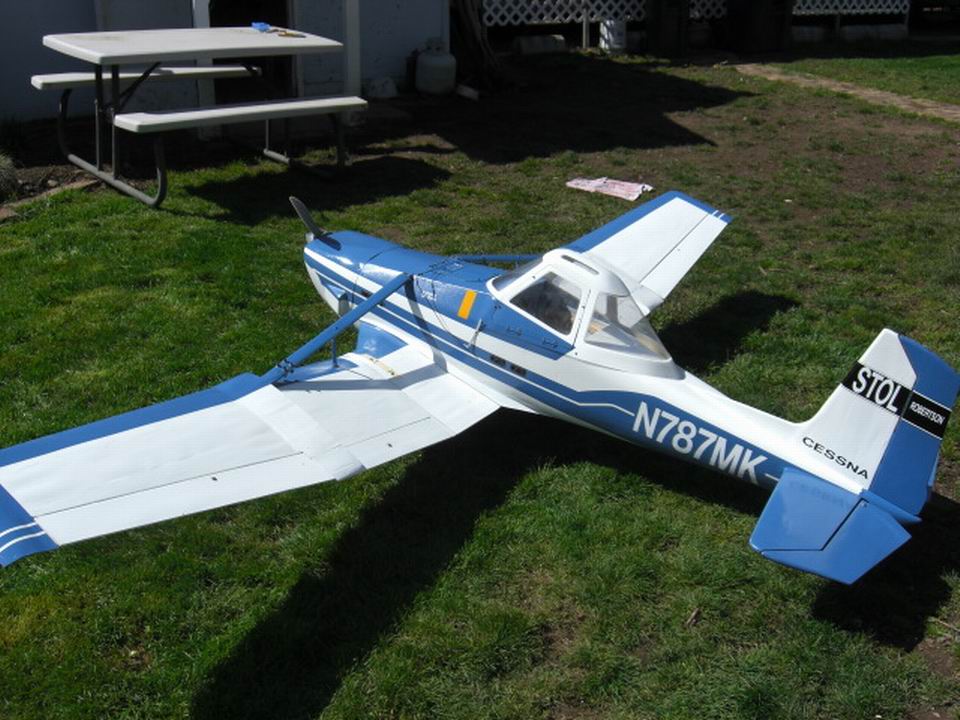
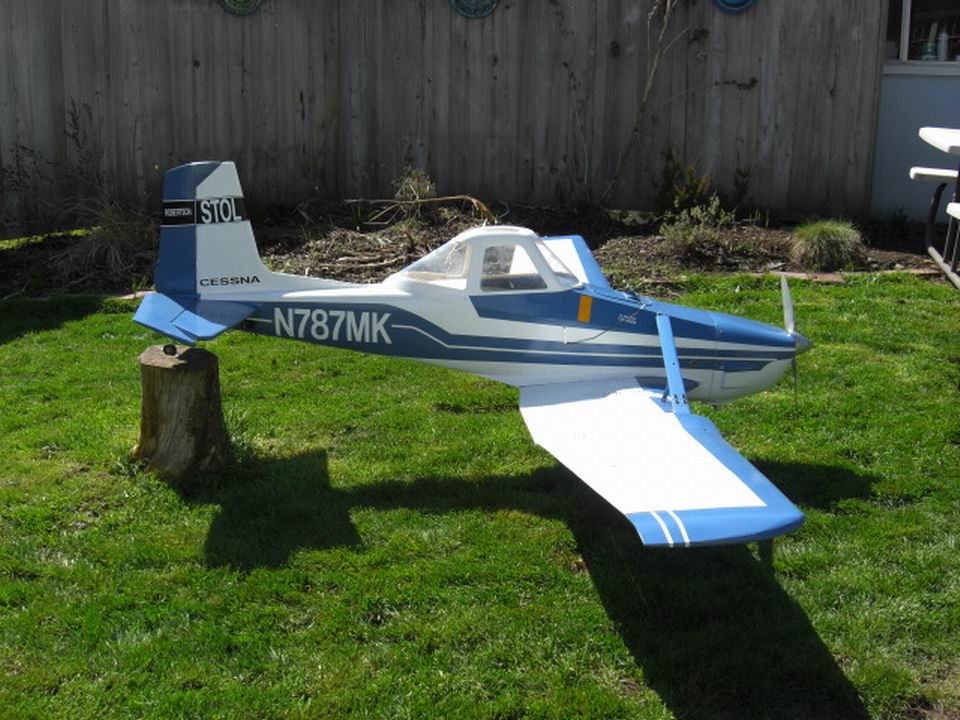
April 13 Marty
Wittman pics
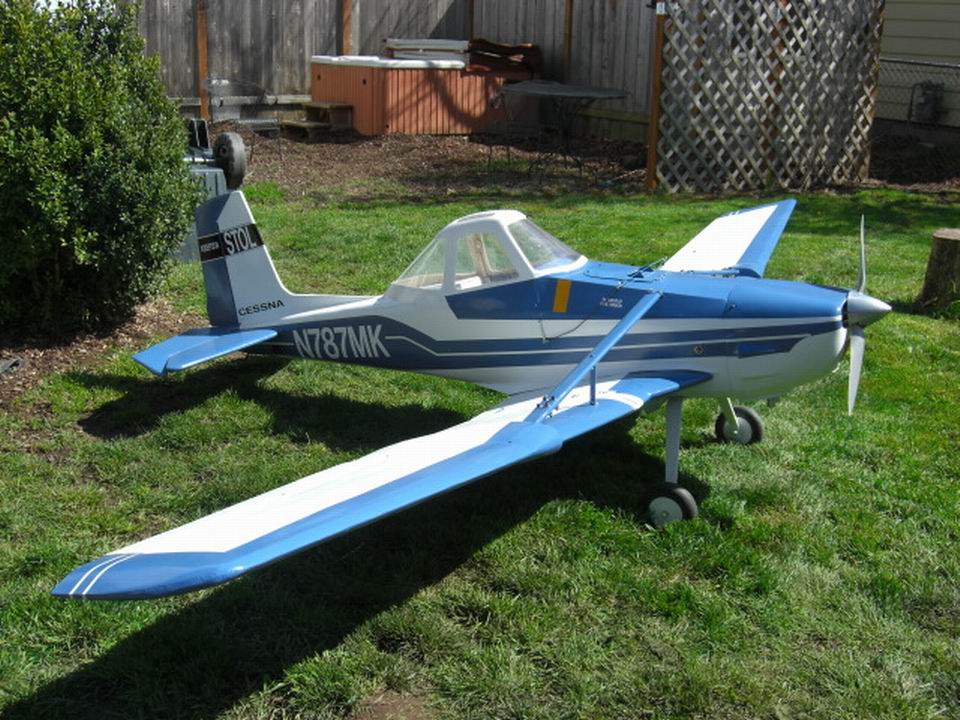
Ag-Wagon
update
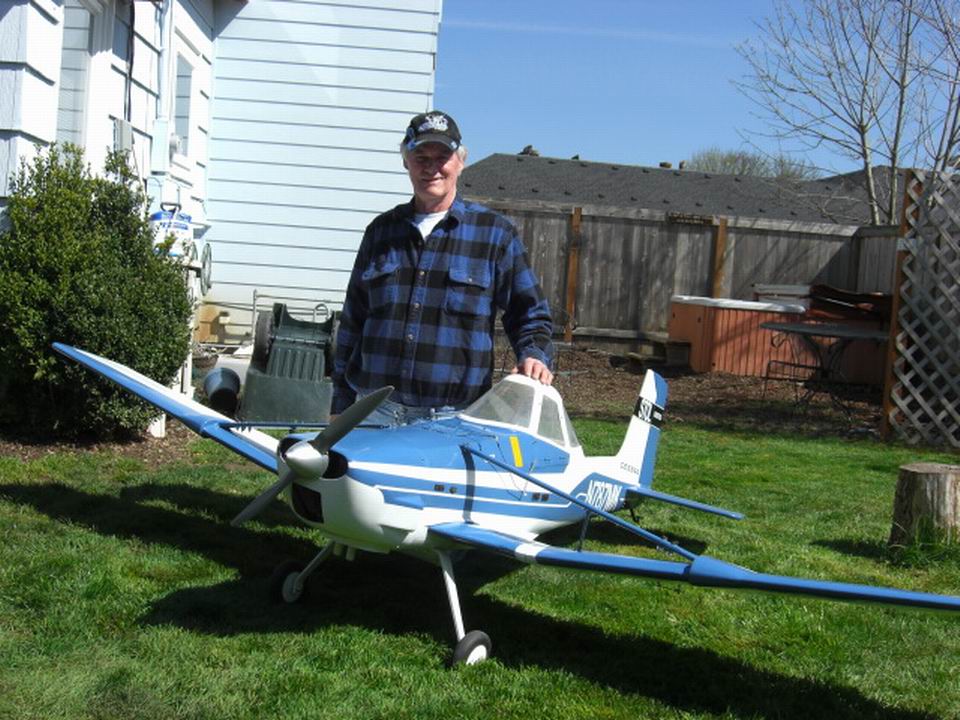
Here are the final pictures of the
AgWagon. If weather clears it will fly soon !!
It is finally done !!!!!! 123.5 in wing, Brison 53cc, and
23 lbs !! Yahh Hooooo!!!!
See you
Marty Wittman
|
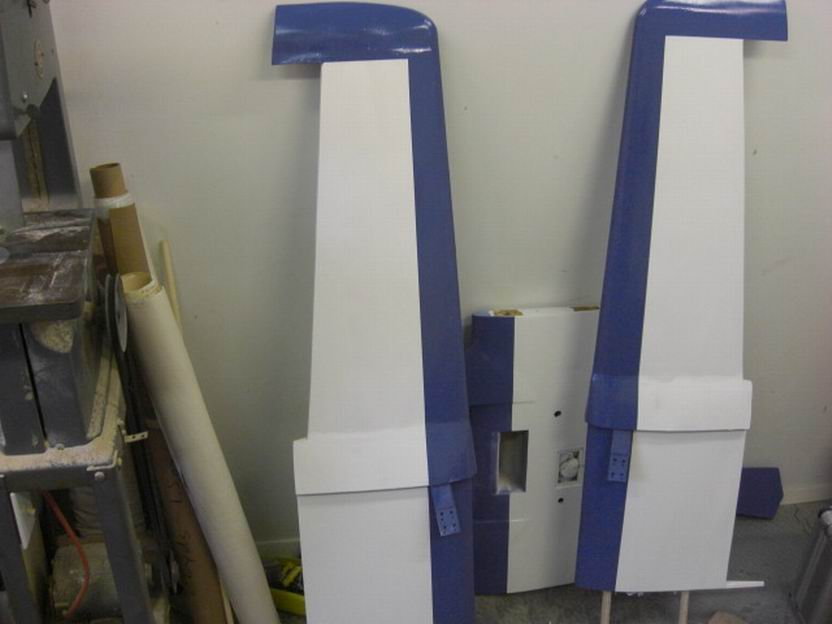
March 15 Marty
Wittman pics
Ag-Wagon
update
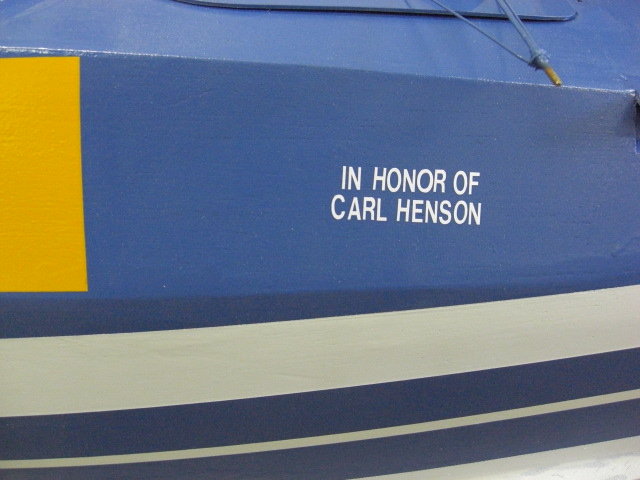
Ag-Wagon is coming along very slow
but it coming. Everything is painted and now starts the
installation of ailerons, flaps, elevators rudder, servos and radio
gear. The engine and throttle servo is in and working as is the rudder
servo.
I got all the decals yesterday and I’m excited to put the finishing
touches on it... I think Carl would be proud!!
See you
Marty Wittman
|
March 12
|
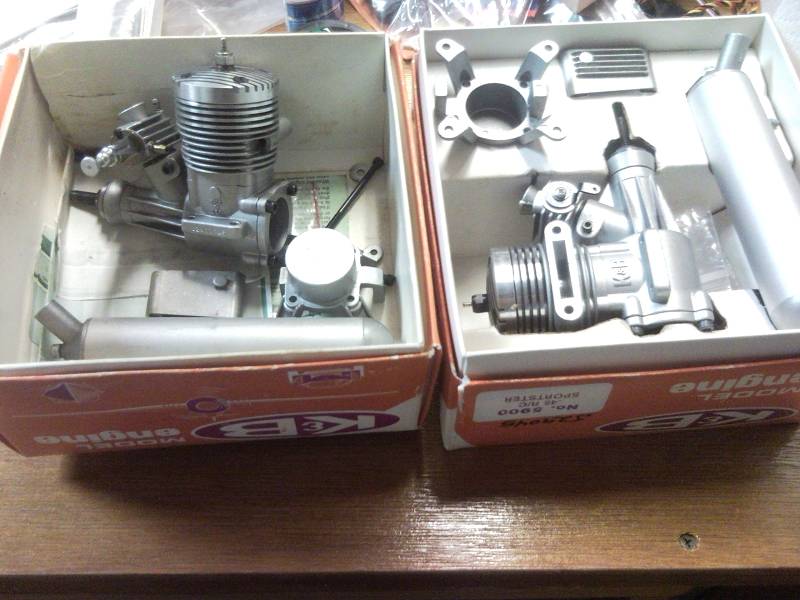 |
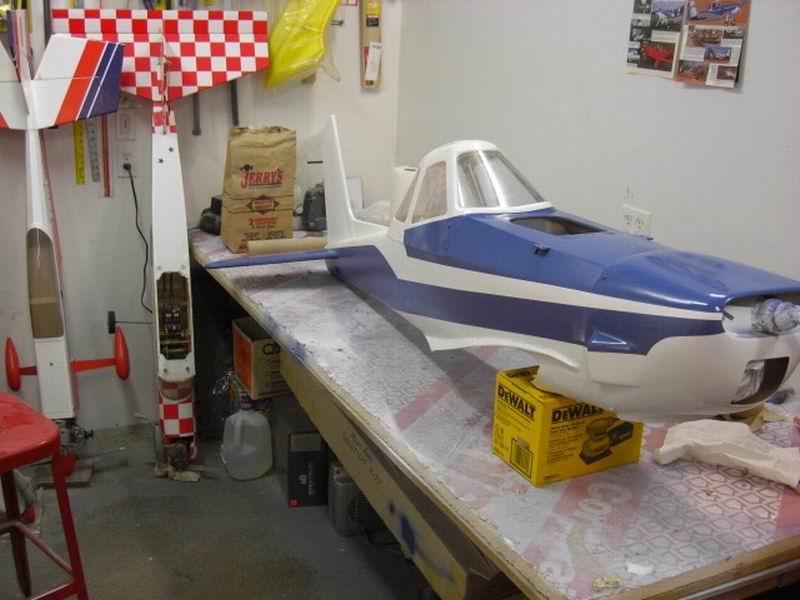
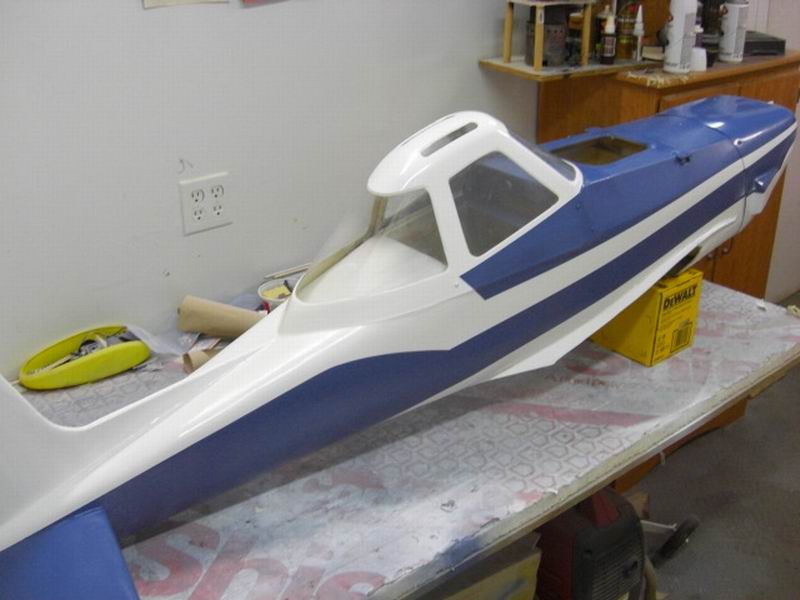
Cessna
421C
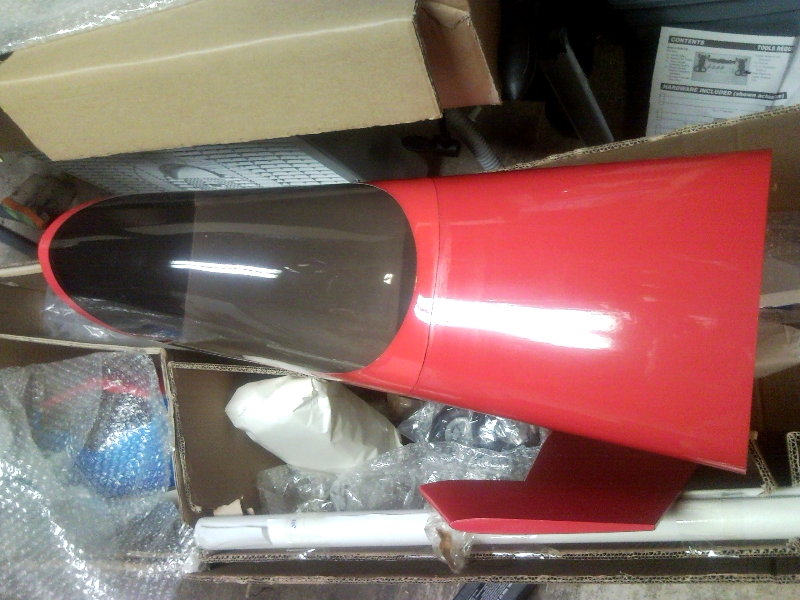
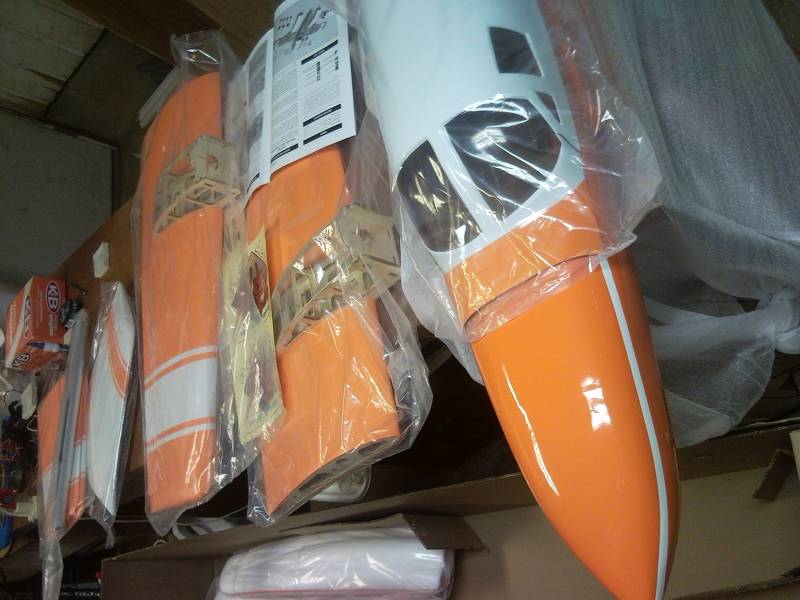
I recently
purchased from Nitro Models their Cessna 421C in its bright oranage and
white scheme. It comes set-up to be easily modded for rail-mount
retracts. The fuselage is fiberglass, and is actually pretty well done.
My plan is to use two K&B .45 Sportsters on it and a complete mix
of servos that I have lying around.
The Cessna 421
is a nostalgic project for me since my dad owned one or two of them
over the years and we travelled in them frequently. I was often the
co-pilot. I loved that plane and I always wanted to build an R/C
version.
So, after
watching the Nito Models 421 on sale for $199.99 for several weeks, I
finally sold some things and bought it.
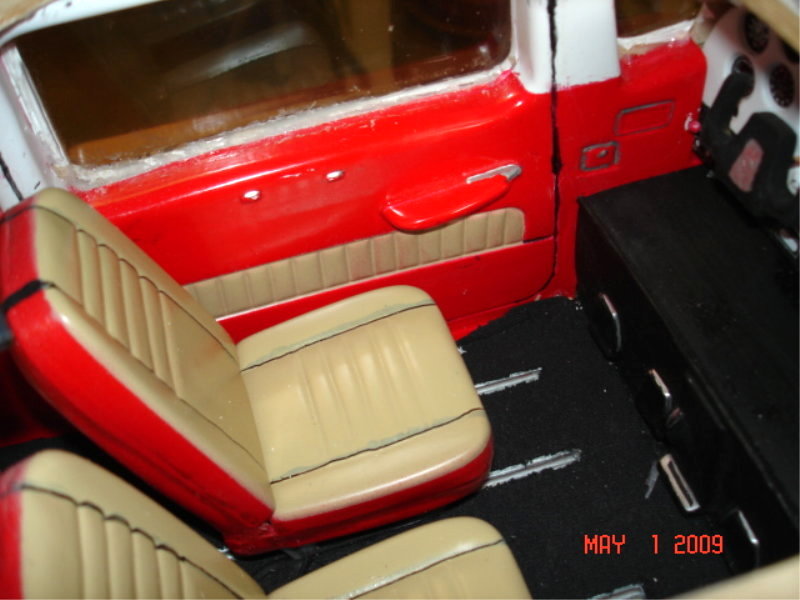
Above are some
pictures that I took the day I got it. You can see that the canopy
arrived with several cracks in it, but using their forum on RCU I got
in contact with a gentleman who is sending me a replacement, which
should arrive any minute now.
Here's a link to
the build thread on RCU: http://www.rcuniverse.com/forum/m_8571528/tm.htm
-Pat
|
March 10
 |
And
it begins!!
Phase one.
Marty
|
February 24

|
It is 99 % done ! CG IS RIGHT ON !!
Guna be
a fun one !!! 22 1/2 lbs dry !!
And the BIG crop duster will
be painted
this week..
Marty
|
February 16
|
 |
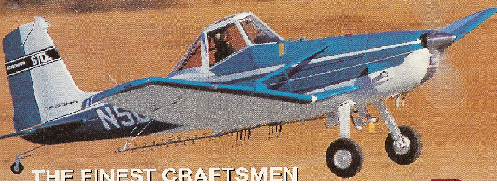
Ag-Wagon
update
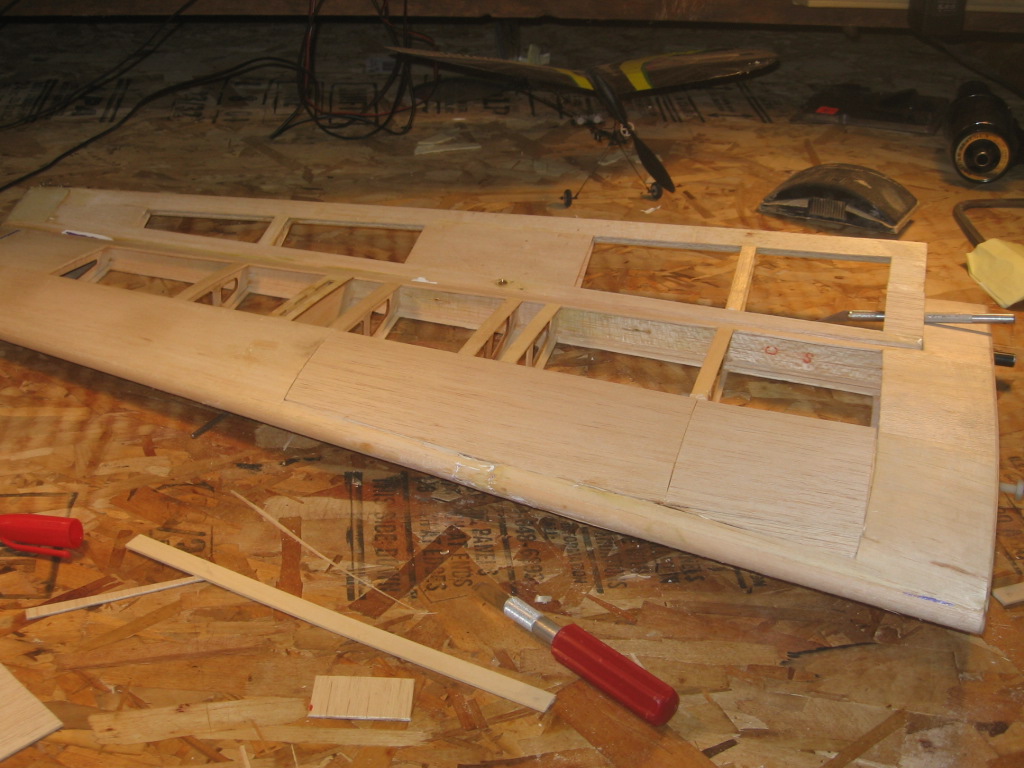
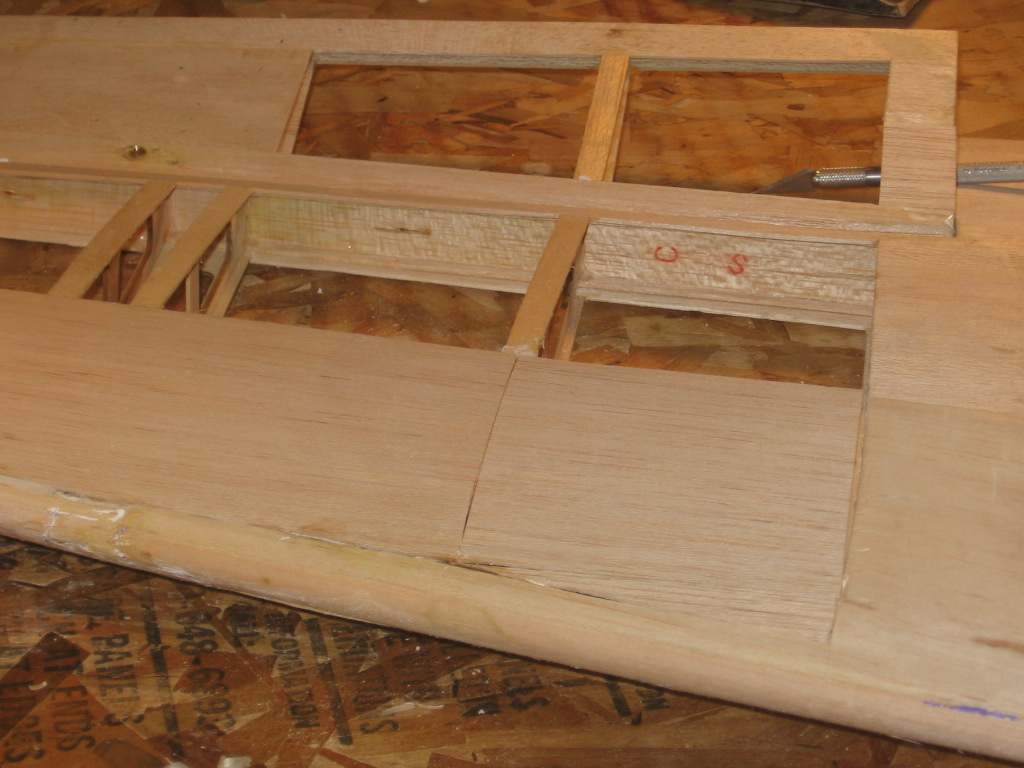
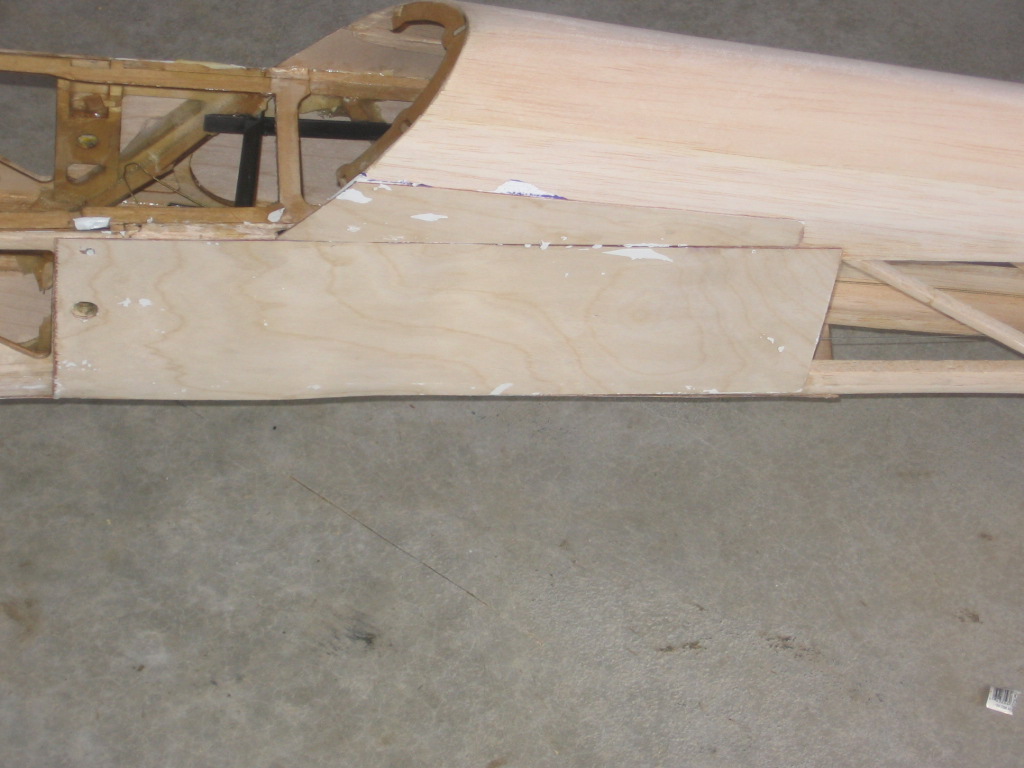
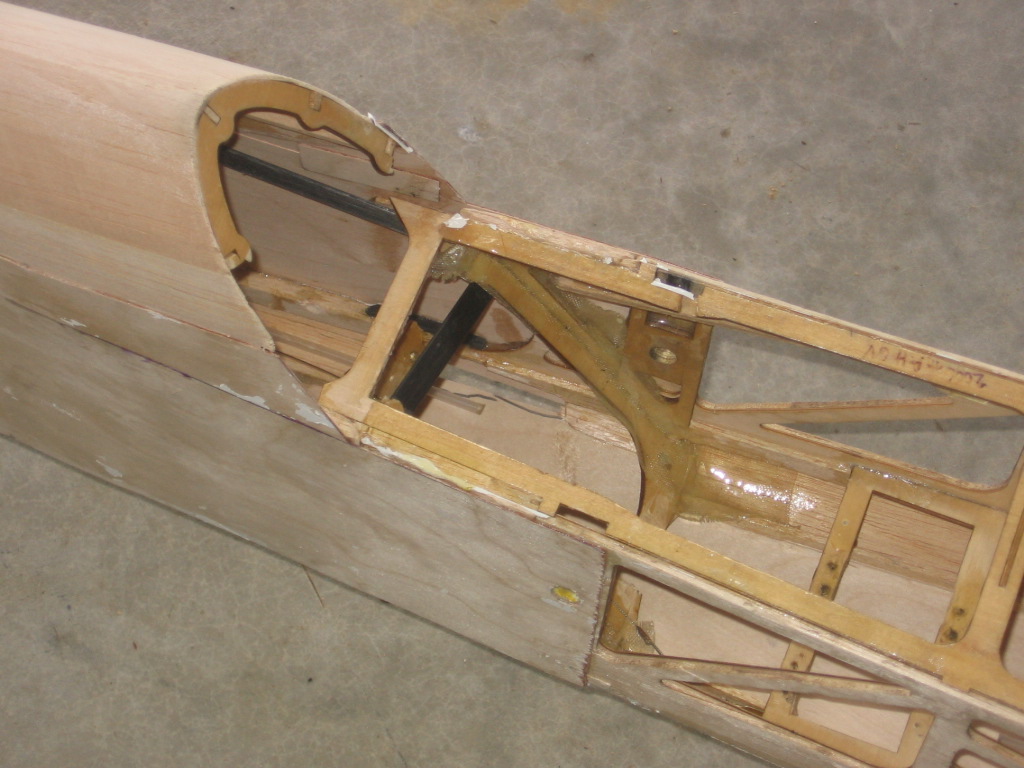
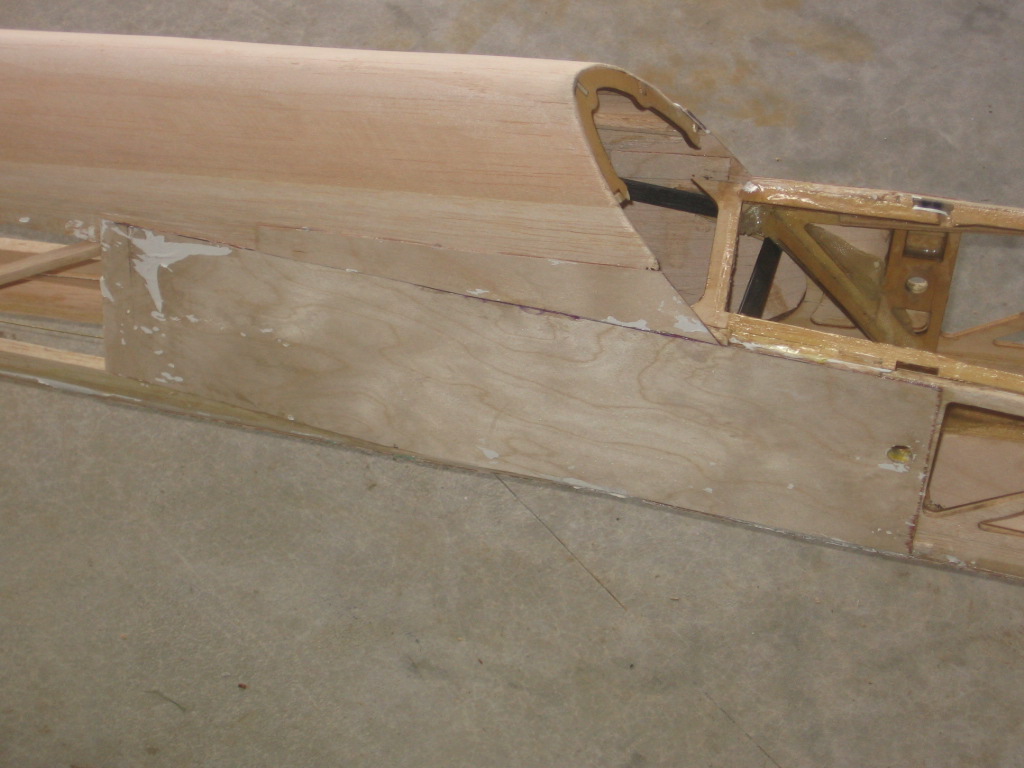
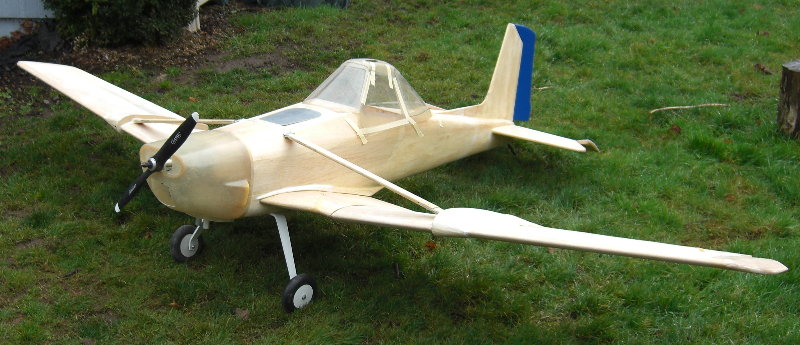
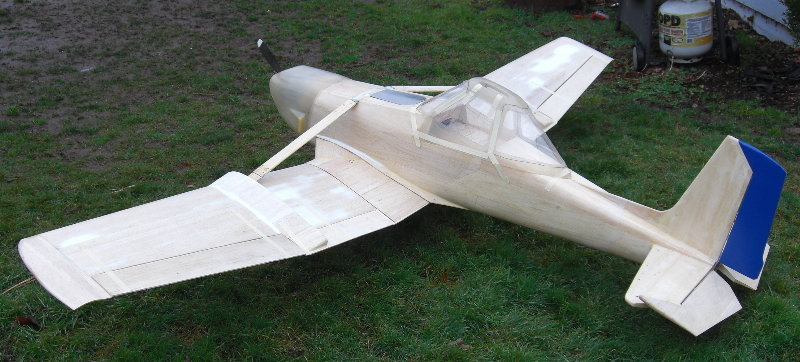
Here is an update on the Cessna
188 (crop duster) It is in final stages of build and will be ready for
color this week. It has been a long road with this thing! All you have
are 4 sheets of plans and a big desire. Building is fun for me
anyway. I love it. I used 1.5 oz glass cloth on it and it came out real
nice. Servos are in the wing along with the flap servos.
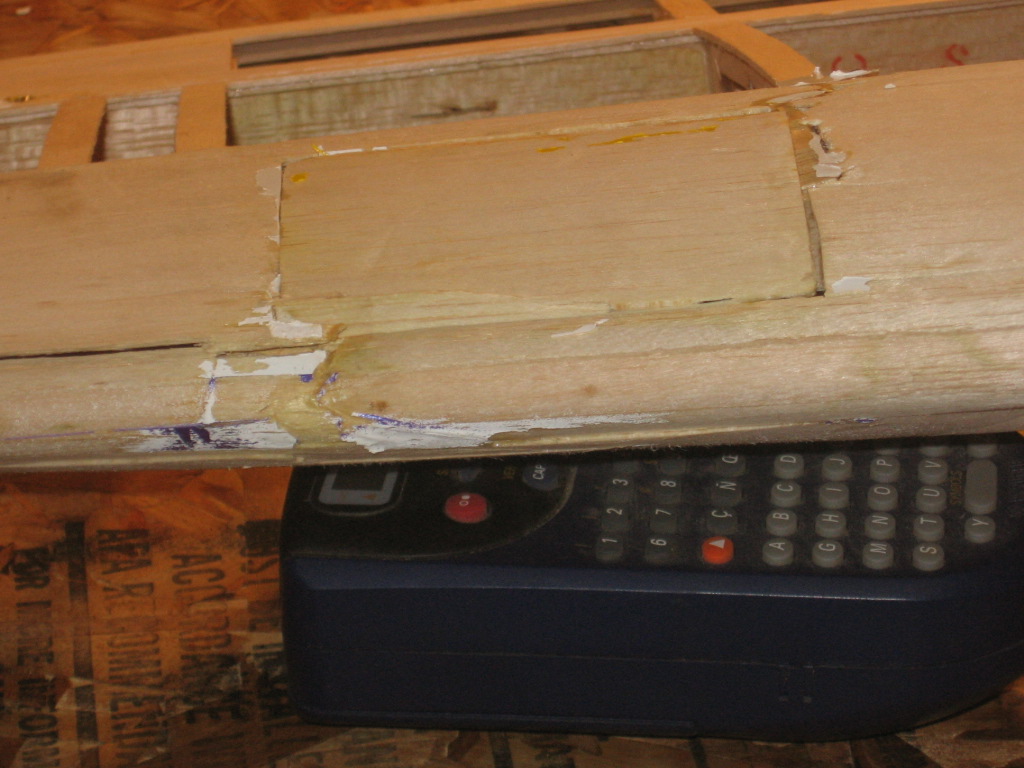
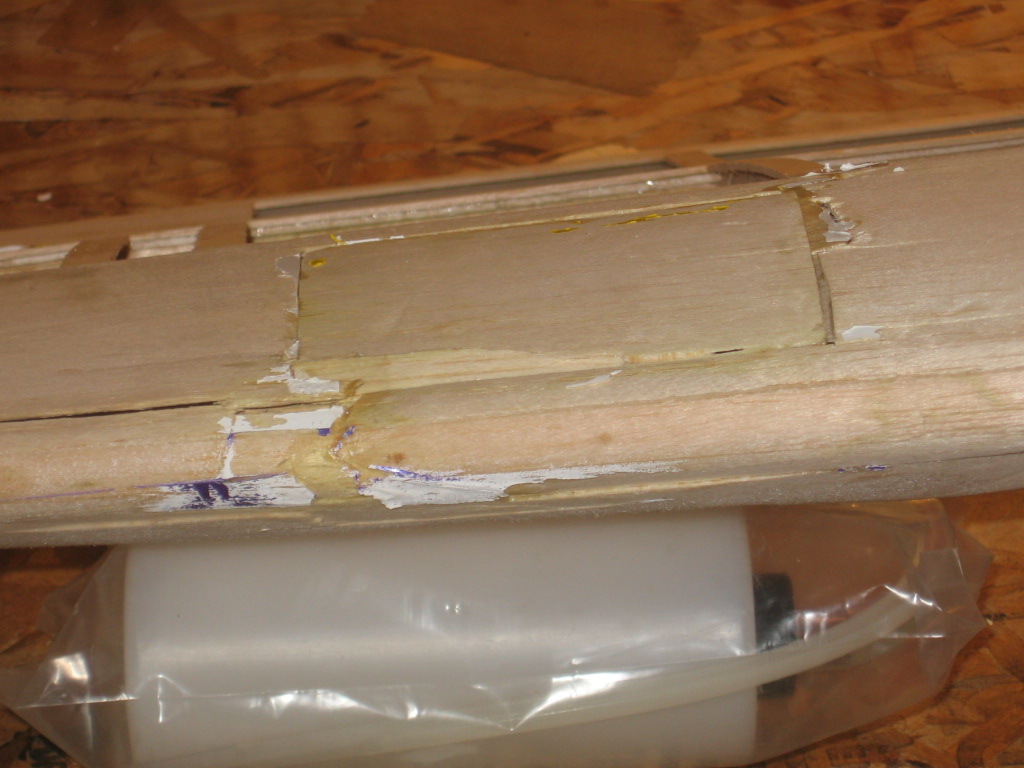
The rudder was a different design
then I have ever seen before. For the control horn they use a 1/4 X 5in
brass tube bent at the bottom at a 90 degree and the clevis attaches to
that. Then you cut a slot 1/4in along the pivot point and epoxy it in
place. However, Carl must have had a different idea on controlling the
rudder. When I tried to install the rudder on the vertical, I found
that the rear of the vertical was 3/4 in to far forward. To make this
rudder control work I would have to cut through the rear support.
Ok now what ??? So I
installed a 1/2 balsa to the rear and added small pieces on the sides
and thin sanding the h--- out of it .. But it works!!
Then I had to modify the tail cone but that was easy! One other
modification is the tail wheel. On the plans the tail wheel is free
floating (no input) So, I installed pull/pull cables to control the
ground steering.
The only thing I have left is CG.
That will happen tomorrow. The CG will determine where I put the servos
for the elevator. I hope I can install them in the back !! Make
life easer that way !! The plans call for one servo for elevator
control but I am a believer in two servos for elevator. Doesn’t matter,
it’s just one of my things.
So Boy and girls I
will bring it to the March meeting and it should be ready to
fly!!!!
See you
Marty Wittman
|
February 6
|
 |
Alien Speed_top
|
Alien Speed_bottom
|
January 14
|
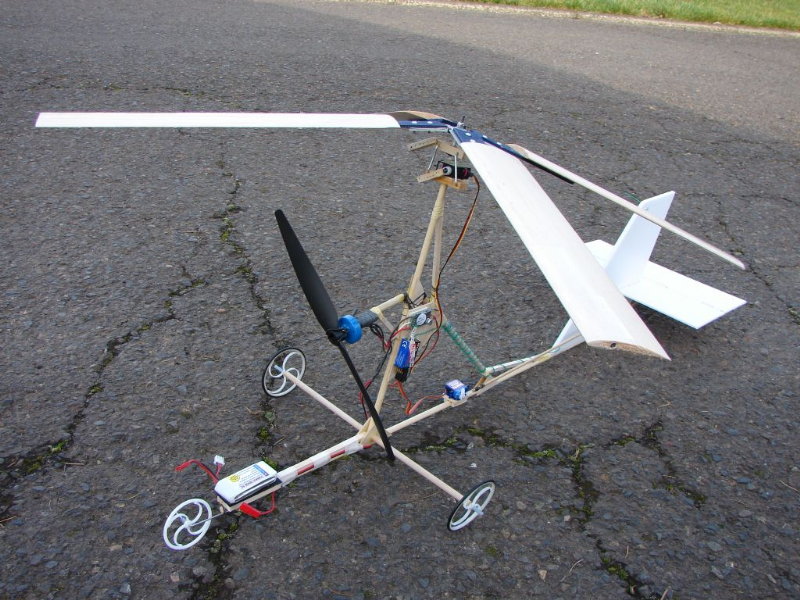
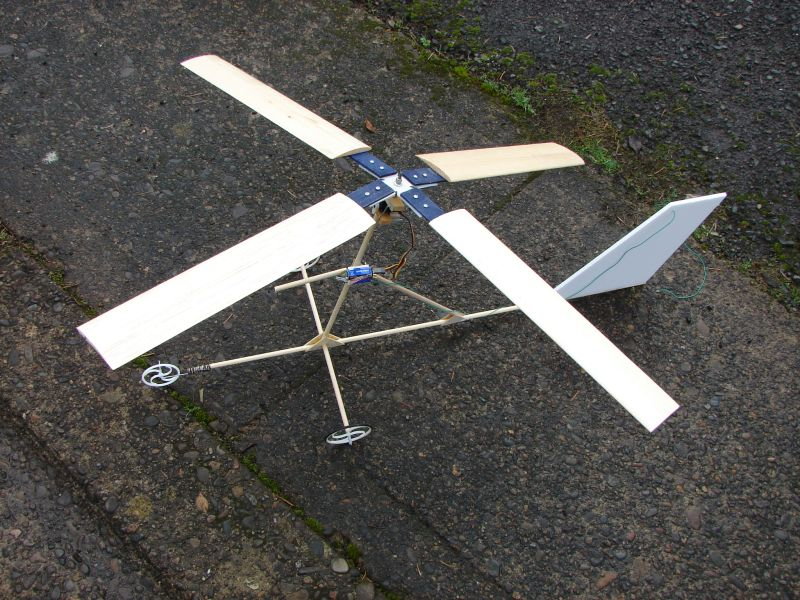
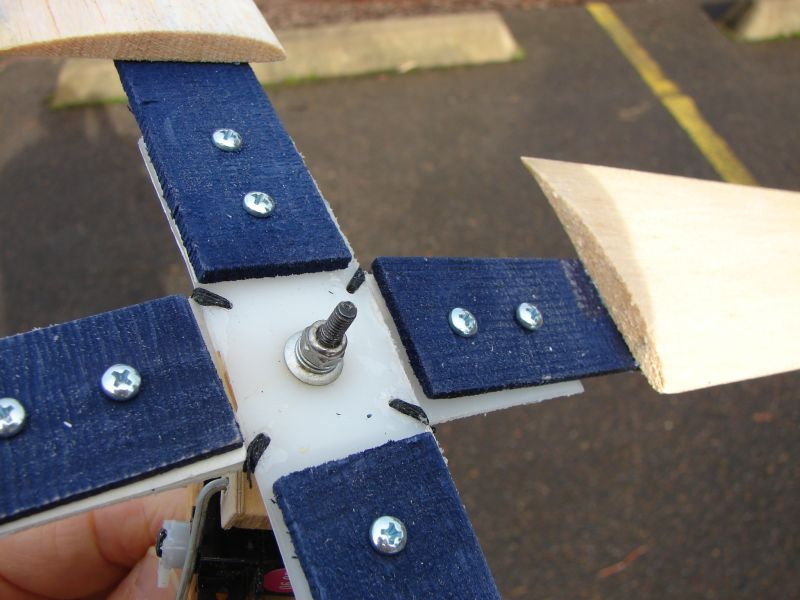
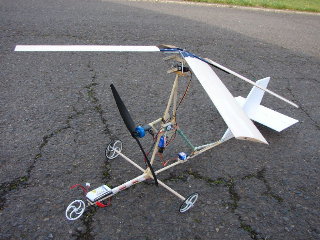
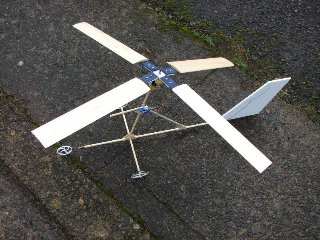
Autogyro ready to test
|
January 12, 2009
|
 |
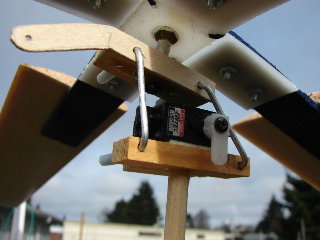 |
Autogyro
|
original design
|
by
Rich Richardson
|
December 10
Ag-Wagon |
|
|
As some of you
know or don’t know Carl Hansen was a builder. He designed and scratched
built many airplanes. He started scratch building an Ag-Wagon (some of
you may think of this as a crop duster) from “New Zealand Aero Products
Planes” (123.5 wing) many years ago witch he never had time to finish.
Carl is now flying with the angles.
I was fortunate
enough to come across this plane and I am now in the process of trying
to finish Carl’s work. I love building and you fall in love with them
and yes when they go in it makes you think of an ARF. You know 2 days
from box to in the air.
Anyway, it is
designed with the wing (ten feet) all one piece. Well I don’t
think so. So I designed the wing to be plug in. Took some doing but
works. But as things go, when you modify one thing you have to modify
something else. The struts are designed to bolt to the fuselage. I had
to redesign them so they are removable both from the wing and fuselage.
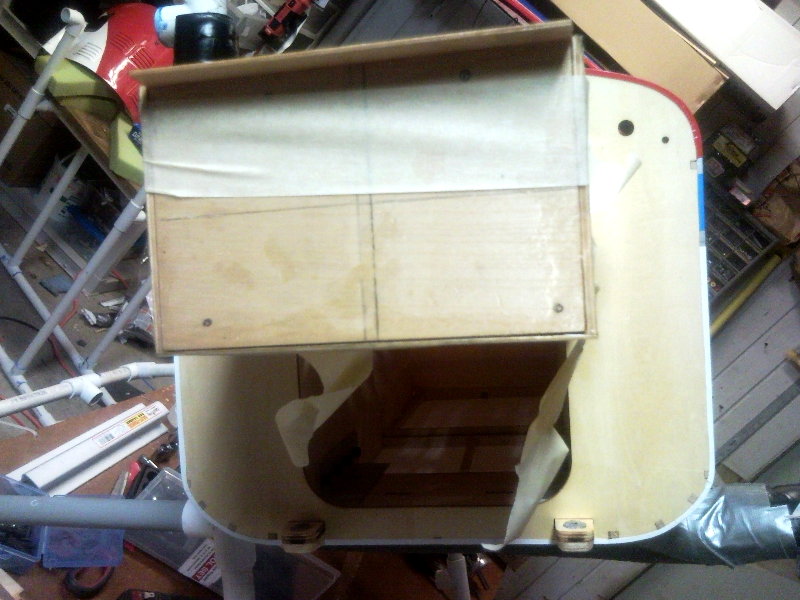
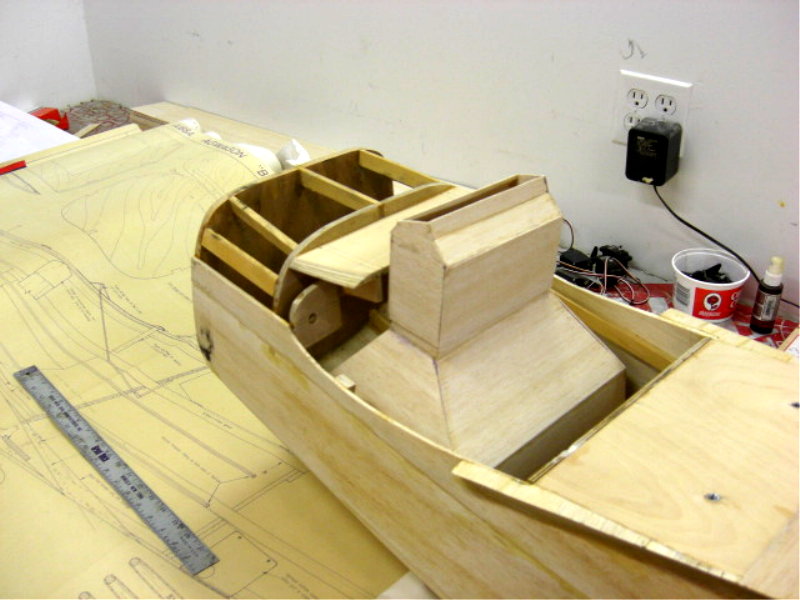
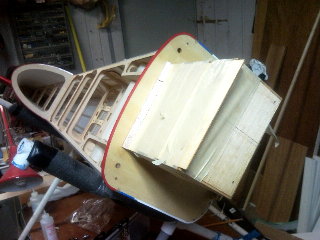
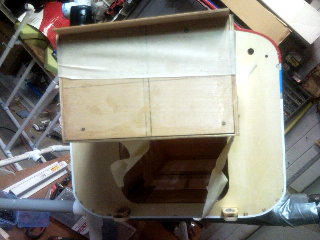
Let’s talk
about the hopper box. That's the box inside the fus that holds the
powder or saw dust or whatever and when you ate ready to drop it. You
flip the switch and open the door on the bottom and if your lucky, the
stuff flys out and it looks real!! I hope! This hopper is 12X11X9
, yes it is a big one. It fits inside the fus . There is a throat that
goes through the center of the wing with a door that opens via a servo
to let the powder out. Is it getting complicated yet? You should be on
my end. Grin.
One wing is now
sheeted and the servo trays are in. The other wing is still just ribs.
I’ll start that today.
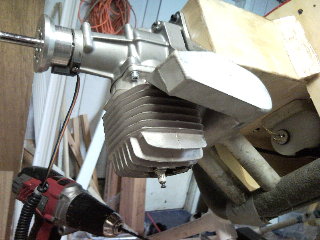
What engine is
he putting in it you asks? Well thanks for asking. I have a Brison
3.2cu (53cc) that I made an engine box and fitted to the firewall. It
will spin a 22X8 prop.
It should weigh
in around 22lbs. - 23 lbs. (I hope).
I’m glad the
rainy season is here so I can work on it. You see, when I start one of
these it becomes unfinished business and I can’t stop until it’s
finished.
Enjoy the
pictures
Marty Wittman
|
December 7
|
 |
 |
Heel Lift Orig
|
Heel Lift Mod 1 |
Heel Lift after first flight- Rich |
December
10 Got the plane trimmed out
and balanced. Flew it this morning and it is a great fun plane to
fly. Rich
December 2
|
 |
 |
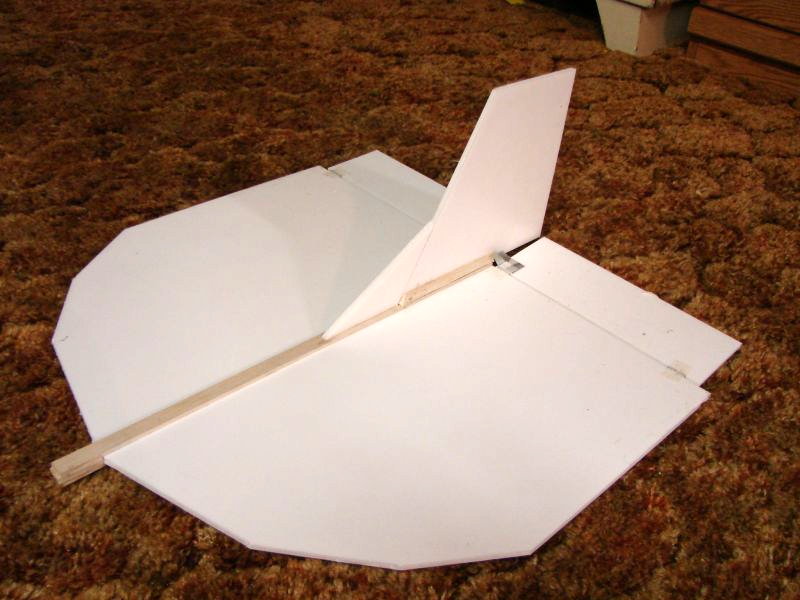
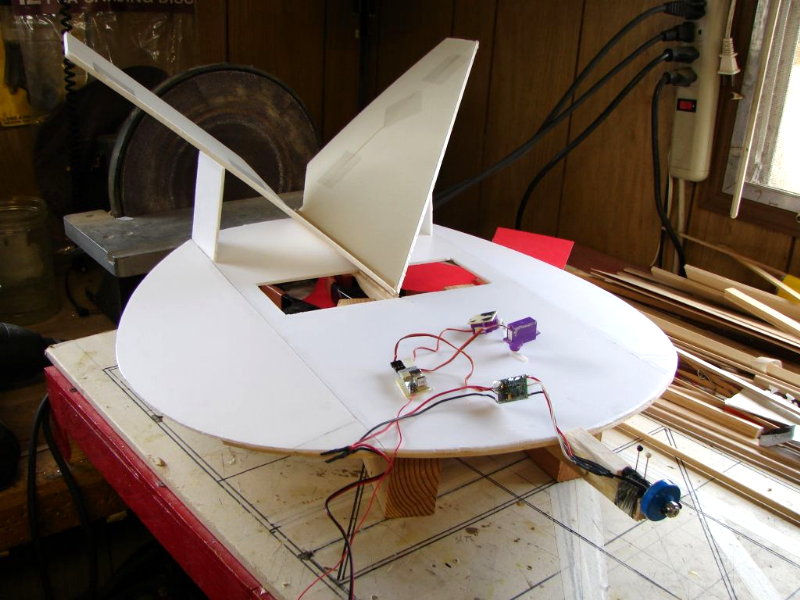
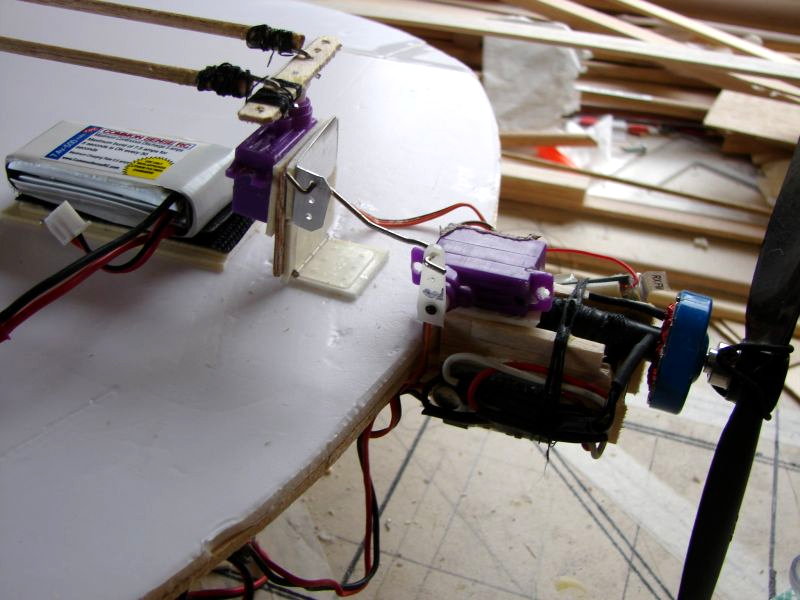
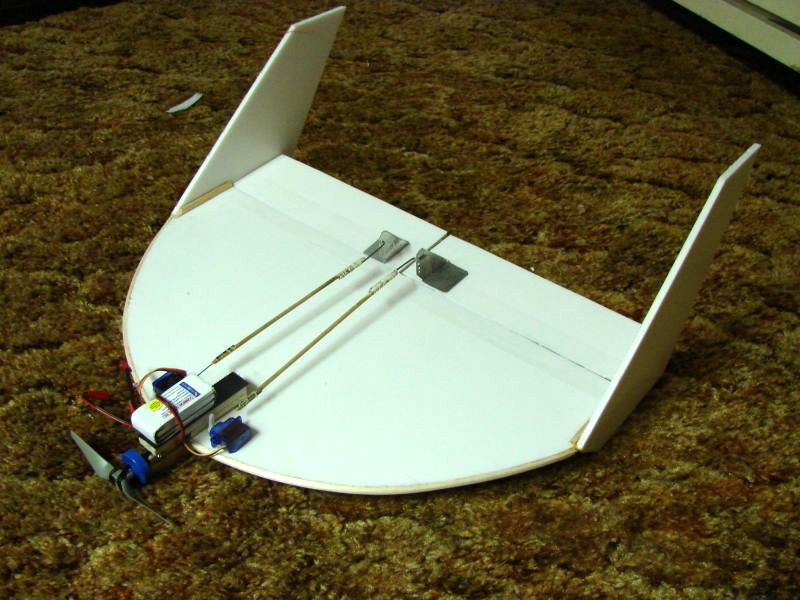
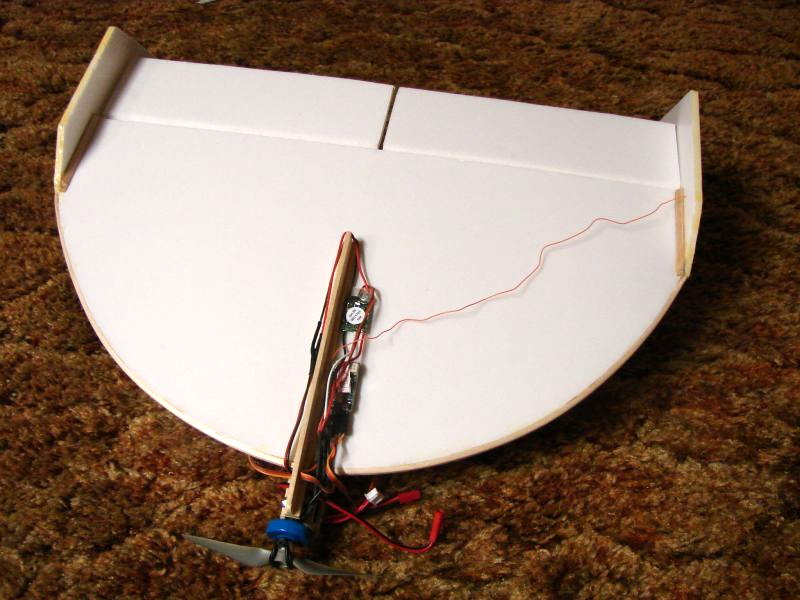
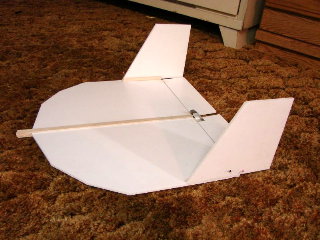
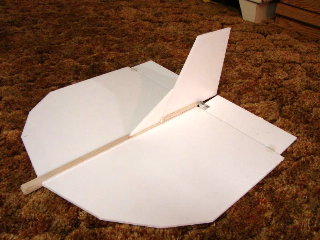
Saucer under construction
|
20 " span weight 6 ounces. |
Space Bug Saucer - Rich |
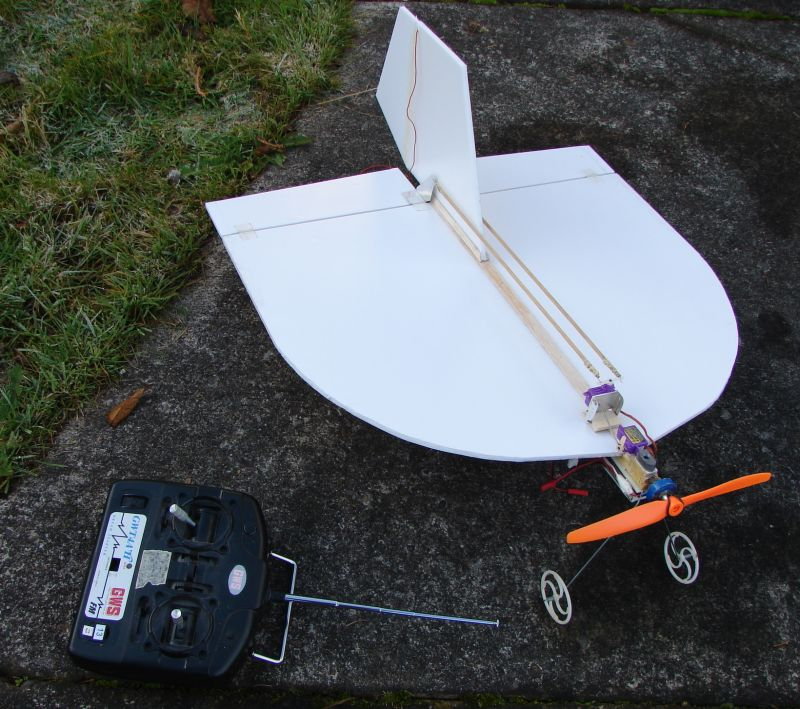
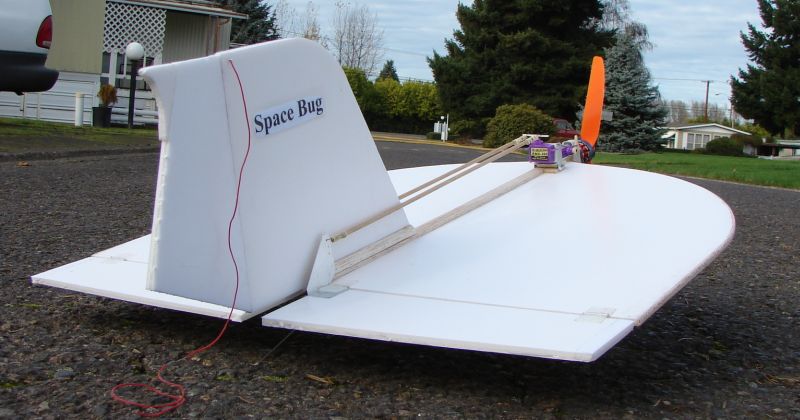
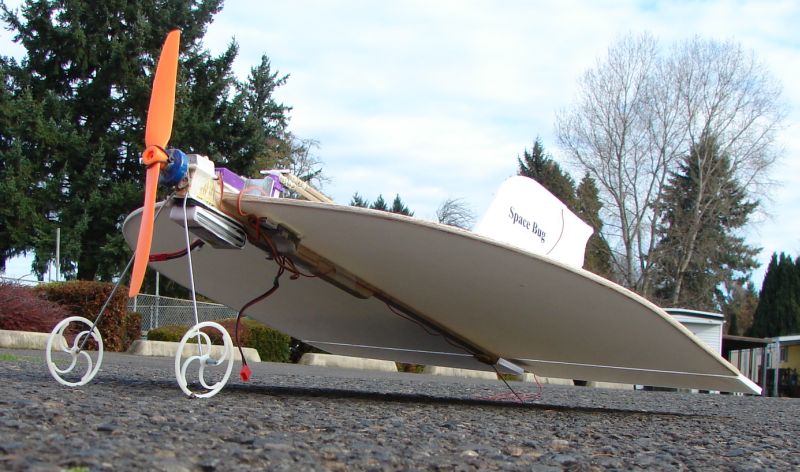
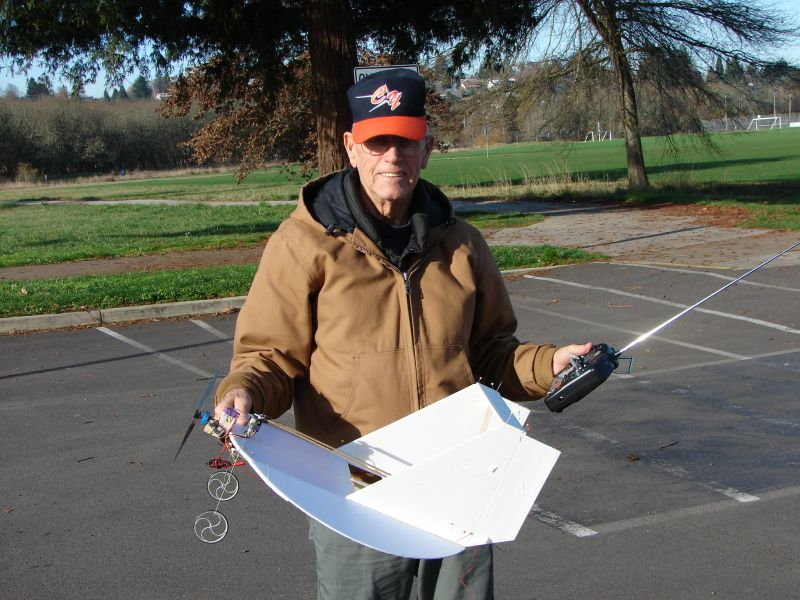
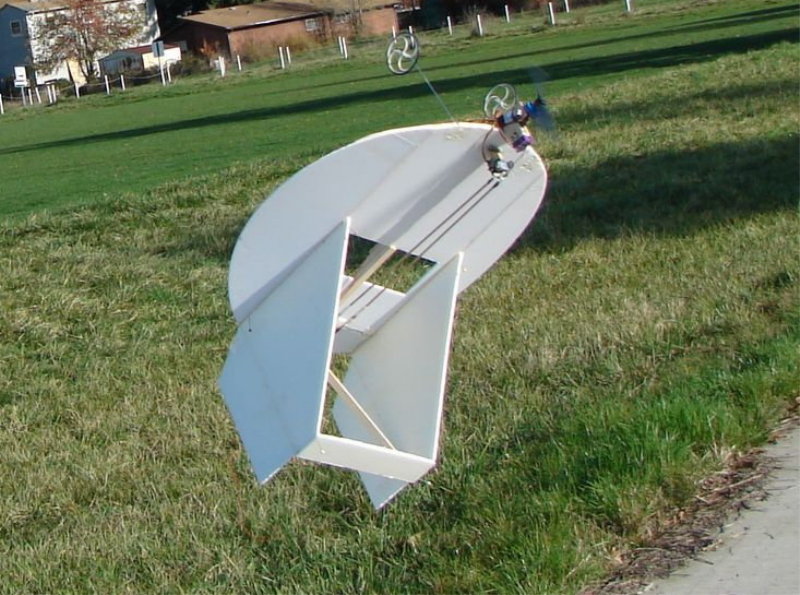
December 5
|
 |
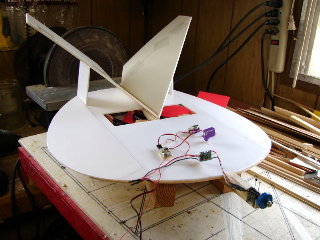
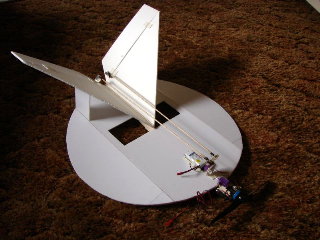
Rich and Saucer
|
Saucer flying, Even does inverted.
|
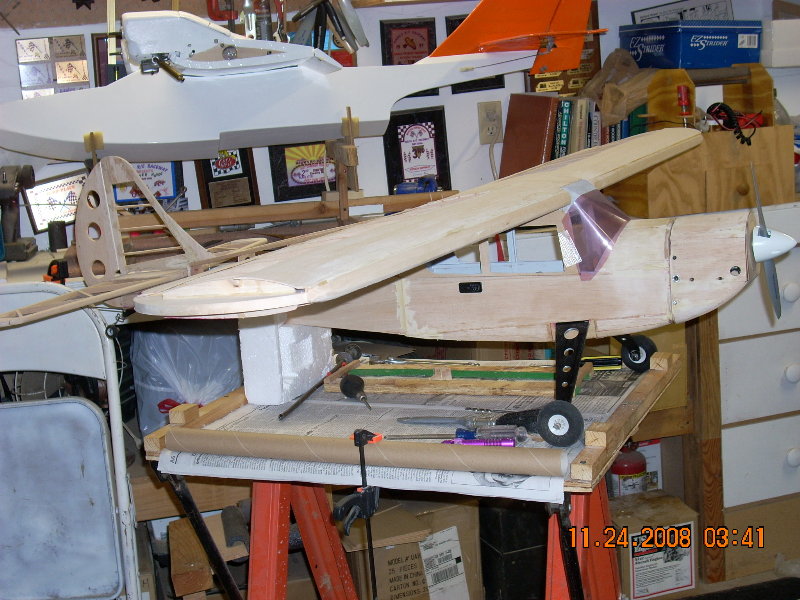
November 25, 2008

|
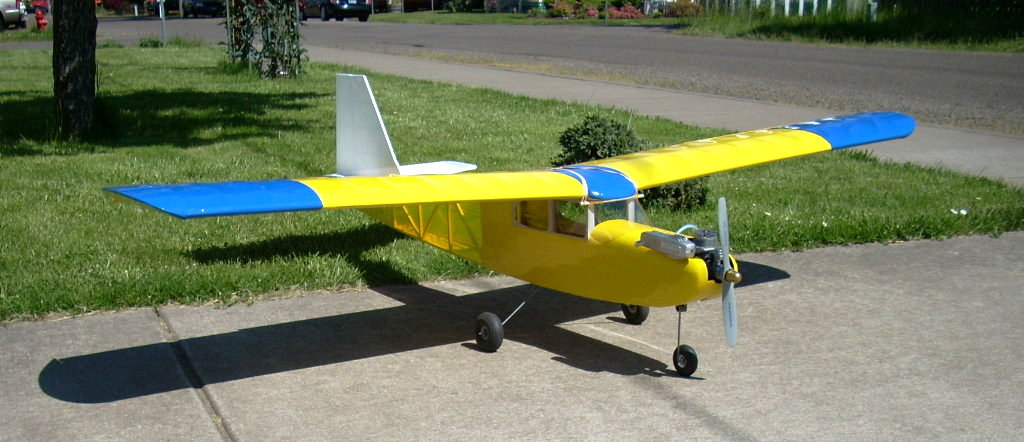
Been working on this for a while. Scratch
built RC Special 62 in
wing span, 46 engine, all most completed. Chick Foster
|
December 2
|
She is done! RC Special ready to
go. Built from scratch. Chick Foster
|
November 3, 2008
|

|
|
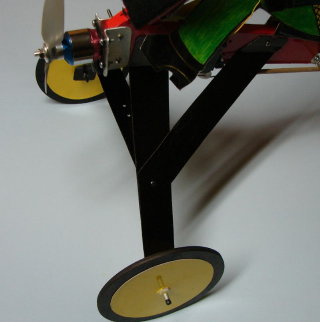
I have added two
new larger 5 " diameter wheels. The wheels
are constructed of 3/16" Birch plywood . The yellow part is cardboard
covered with Monocoat. The
Aluminum landing gear is painted with black felt pen. Rich
|
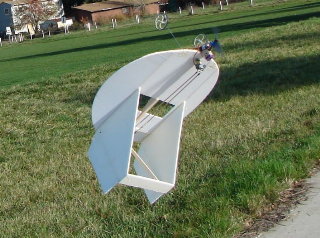
This
is the sea plane I have been working on for about a year. 7 foot
wing span, powered by 2 Saito 50s. Chick Foster |
|
|